Google Pay Developer Documentation
Google Pay™ (formerly Android Pay) is a digital wallet that streamlines card payments, enabling swift and effortless transactions without the need to repeatedly input card information. Google securely stores the card data. This option is compatible with all devices (mobile phones and computers), irrespective of the operating system and web browser.
When utilizing Google Pay, the acceptor is required to adhere to the regulations specified in the following regulations.
Resources
Card Networks Supported
- AMEX
- DISCOVER
- INTERAC
- JCB
- MASTERCARD
- VISA
Payment Processors Supported
- TSYS
- Elavon
Authorization Methods Supported
We support the following authorization methods for transactions processed via Google Pay in the United States:
-
PAN_ONLY: Transactions where Google Pay returns the card PAN. This method is supported for low-risk transactions in the US.
-
CRYPTOGRAM_3DS: Transactions where Google Pay returns a dynamic cryptogram. This method is supported for higher-risk transactions and complies with industry standards for secure payments.
3DS Support
To enable 3D Secure (3DS) for all card types, users must be onboarded with Cardinal Commerce, our 3DS provider.
-
Cards Added via Mobile Devices (Google Pay App)
-
Saved as Device Primary Account Numbers (DPANs).
-
3DS is not required for these transactions as they are already authenticated.
-
-
Cards Added via Chrome or Google Properties (e.g., YouTube, Play)
-
Saved as Funding Primary Account Numbers (FPANs).
-
3DS is required to step up authentication for these transactions, following Google Pay API best practices.
-
Address Verification
Users should enable AVS on iPOSPays portal, then iPOSpays will request for Billing address to Google Payment API and return the value.
Supported Integrations
- Checkout Page
- Embedded Page
- WooCommerce Plugin
- iPOS Transact API
Integration Details
Hosted Payment Page
Provide merchants with a streamlined payment process by using Google Pay as the default payment service.
Default Configuration
- GatewayMerchantID: Dejavoo
- Payment Processor: Dejavoo
Features
- Seamless integration with Google Pay.
- Secure payment handling using industry-standard encryption.
Setup for Merchants
- Ensure the merchant is registered with the Dejavoo system.
- The Hosted Payment Page (HPP) is pre-configured with Google Pay as the default.
How Google Pay Works on the Hosted Payment Page:
User Flow:
- The customer selects the Google Pay button on the HPP.
- Google Pay fetches the payment methods linked to the customer's Google account.
- After customer confirmation, the payment is securely processed via the Dejavoo payment processor.
Default Behavior:
- All transactions are routed through the Dejavoo process.
- The Dejavoo Merchant ID is used as the identifier.
Customization Options
- Branding: Update the HPP logo and colors to match the merchant’s branding.
- Payment Methods: While Google Pay is the default, additional payment methods can be enabled upon request.
Embedded Google Pay
Google Pay allows your customers to submit payment data via a payment method they trust. It also enables you to collect their payment information in a tokenized form, ensuring that the plain text credit card information never touches your environment.
Steps for Integrating Embedded:
- The URL below needs to be added to integrate with Google Pay.
UAT : https://payment.ipospays.tech/ftd/v1/gpay.js
LIVE : https://payment.ipospays.com/ftd/v1/gpay.js
In addition to the above request, we need to add the script tag below to process Google Pay.
<script src="https://payment.ipospays.tech/ftd/v1/gpay.js"></script>
<div id=”ipospays-gpay-btn”></div>

<script>
  const transactionInfo = {
    countryCode: "US",
    currencyCode: "USD",
    totalPriceStatus: "FINAL",
    totalPrice: "100.00", // Replace with dynamic cart total
  };

  const googleMerchantId = "N/A";
  const Mode = "TEST";

  const buttonStyles = {
    buttonColor: "default", // Change the color based on GooglePay Settings
    buttonType: "plain", // Change the type based on GooglePay Settings
    buttonRadius: 4, // Change the Radius based on GooglePay Settings
    buttonLocale: "en", // Change the Locale based on GooglePay Settings
    buttonHeight: "40px", // Change the Height based on GooglePay Settings
    buttonWidth: "300px", // Change the Width based on GooglePay Settings
  };

  initializeGooglePay(transactionInfo, merchantId, Mode, buttonStyles);

  function getPayementInfo(token) {
     console.log("Received Payment Token: ", token);
  }
</script><script src="https://payment.ipospays.com/ftd/v1/gpay.js"></script>
<div id=”ipospays-gpay-btn”></div>
<script>
const transactionInfo = {
countryCode: "US",
currencyCode: "USD",
totalPriceStatus: "FINAL",
totalPrice: "100.00", // Replace with dynamic cart total
};
const googleMerchantId = ""; // Insert googleMerchantId
const Mode = "PRODUCTION";
const buttonStyles = {
buttonColor: "default", // Change the color based on Google Pay settings
buttonType: "plain", // Change the type based on Google Pay settings
buttonRadius: 4, // Change the radius based on Google Pay settings
buttonLocale: "en", // Change the locale based on Google Pay settings
buttonHeight: "40px", // Change the height based on Google Pay settings
buttonWidth: "300px", // Change the width based on Google Pay settings
};
initializeGooglePay(transactionInfo, merchantId, Mode, buttonStyles);
function getPaymentInfo(paymentData) {
console.log("Received Payment Token (Raw):", paymentData);
}
updatePrice(priceValue);
</script>Default Configuration:
- Payment Processor: Dejavoo
- Merchant ID Setup:
To obtain a Google Merchant ID, follow these steps:
- Visit the Google Pay Business Console:
- Go to Google Pay Business Console.
- Enter Required Information:
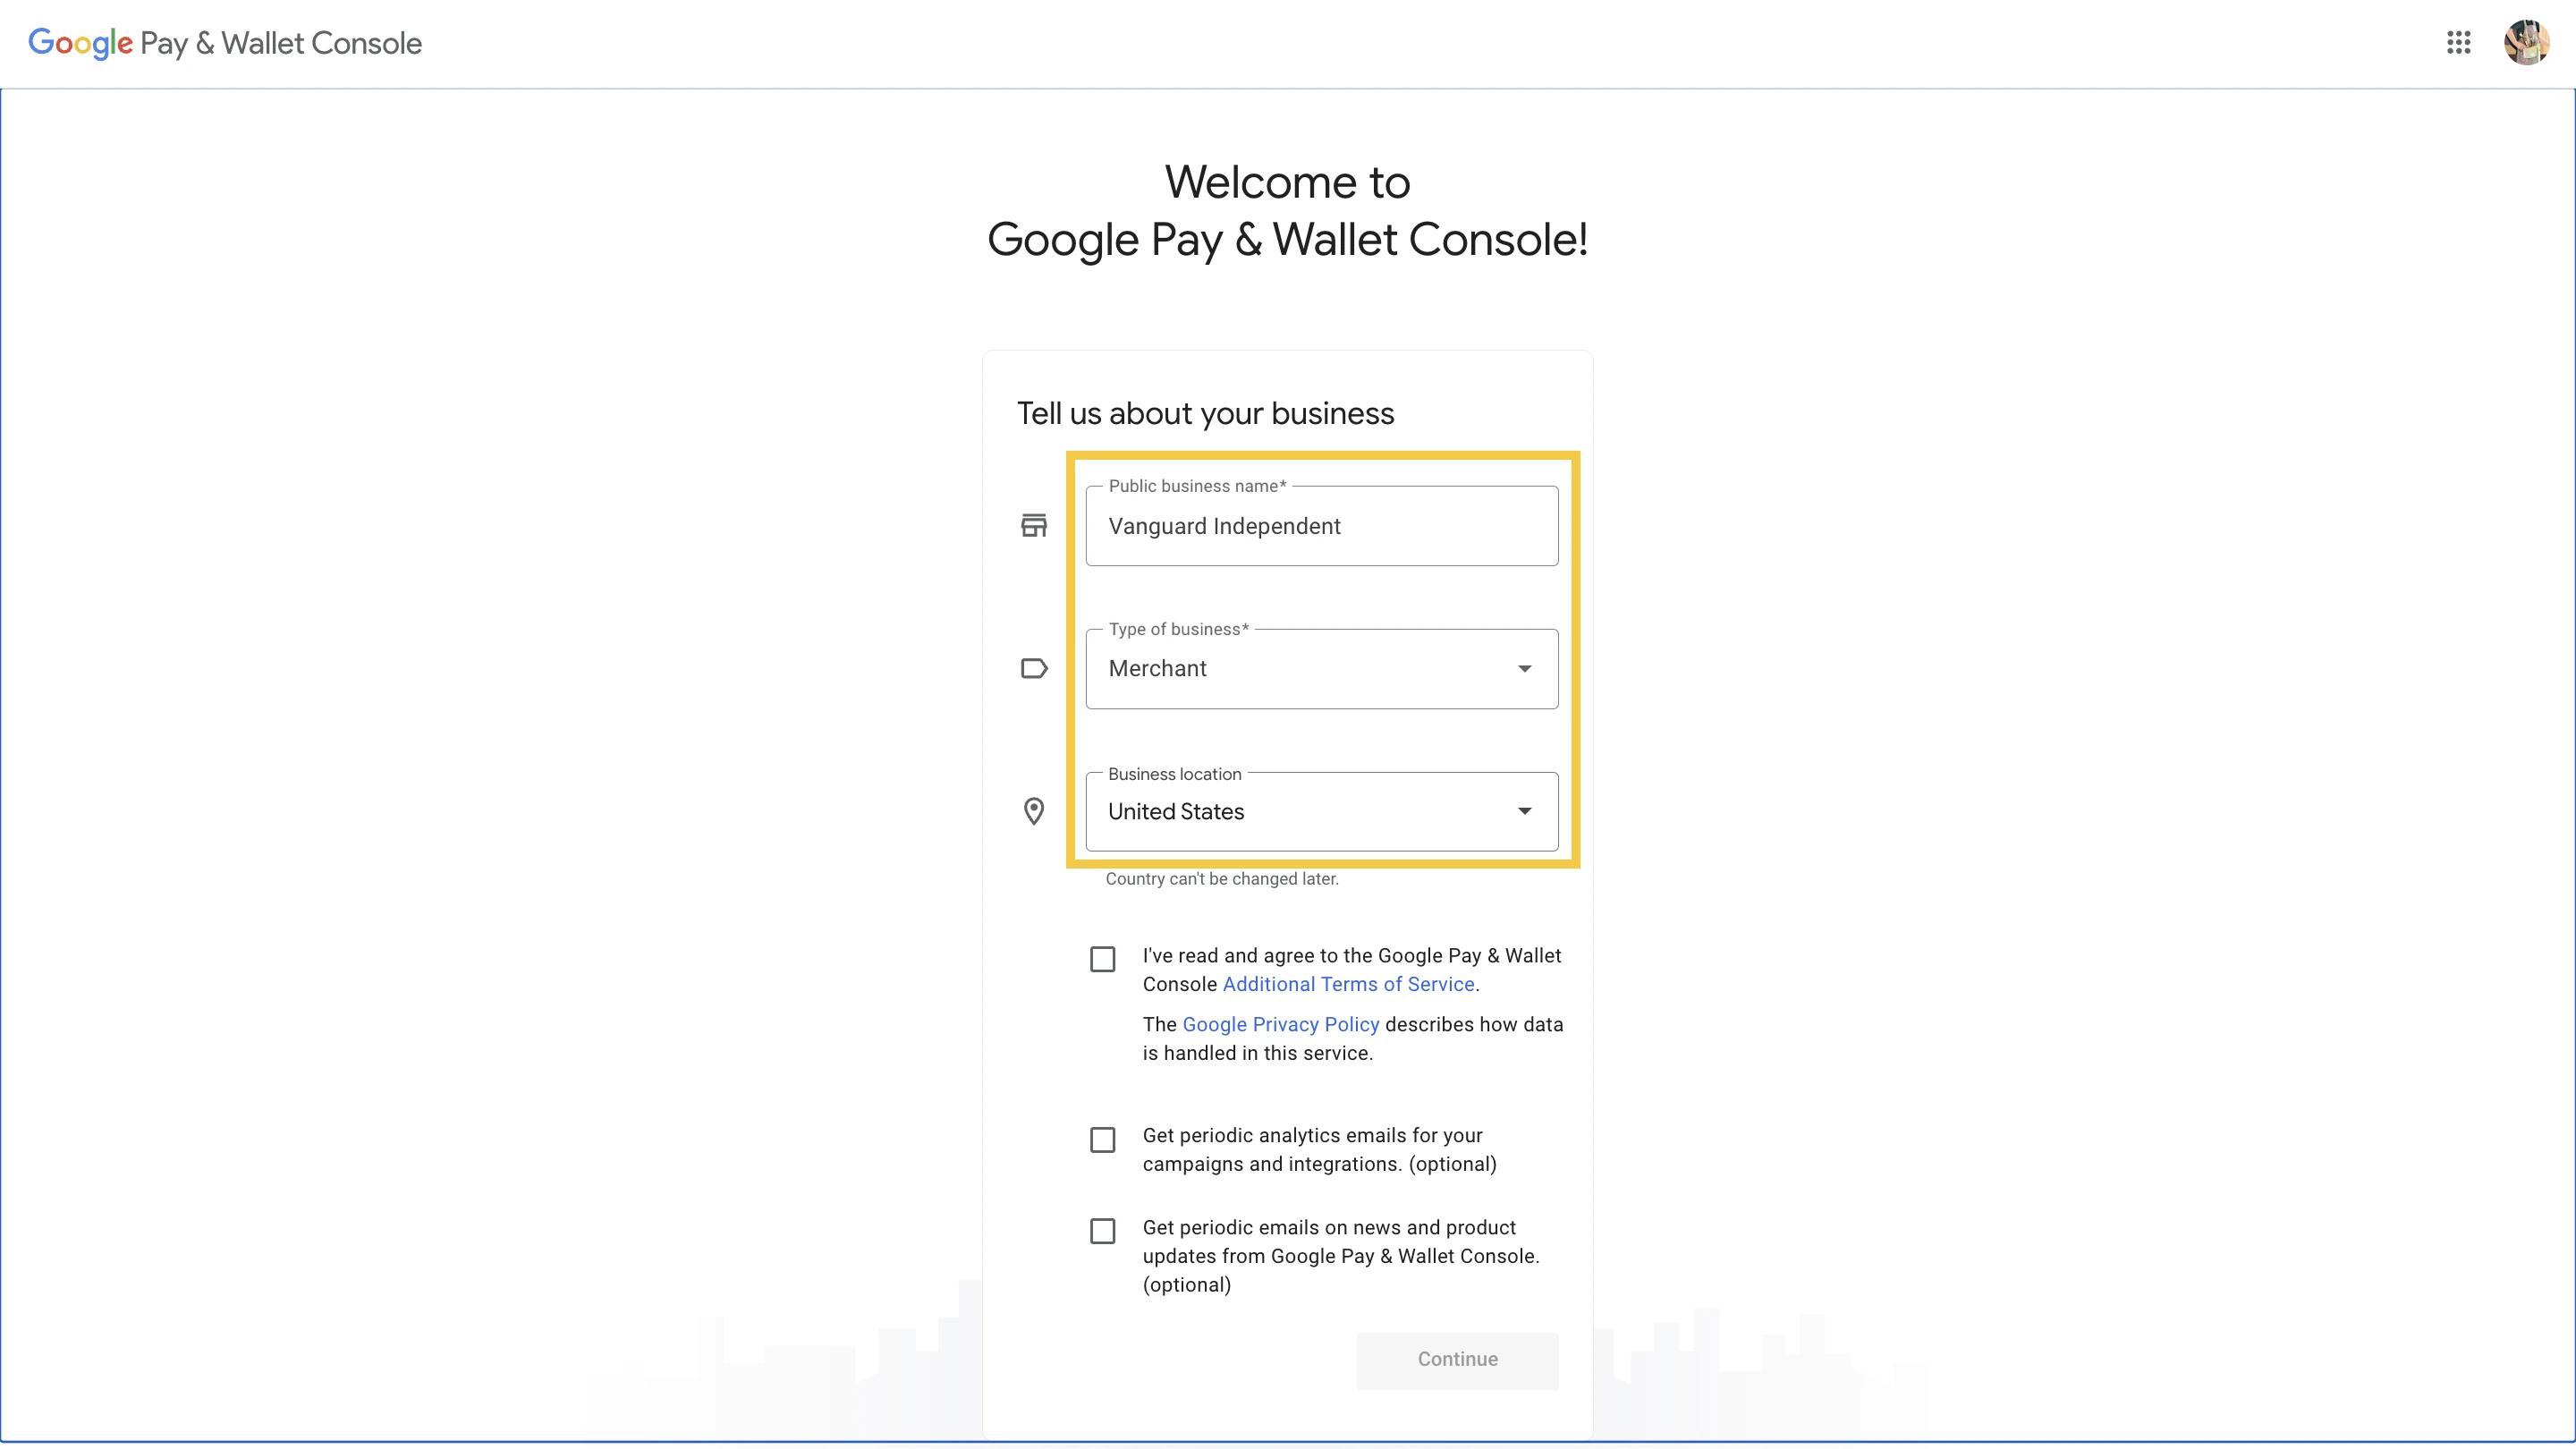
-
Public Business Name
-
Type of Business
-
Business Location
- Agree to Terms & Continue:
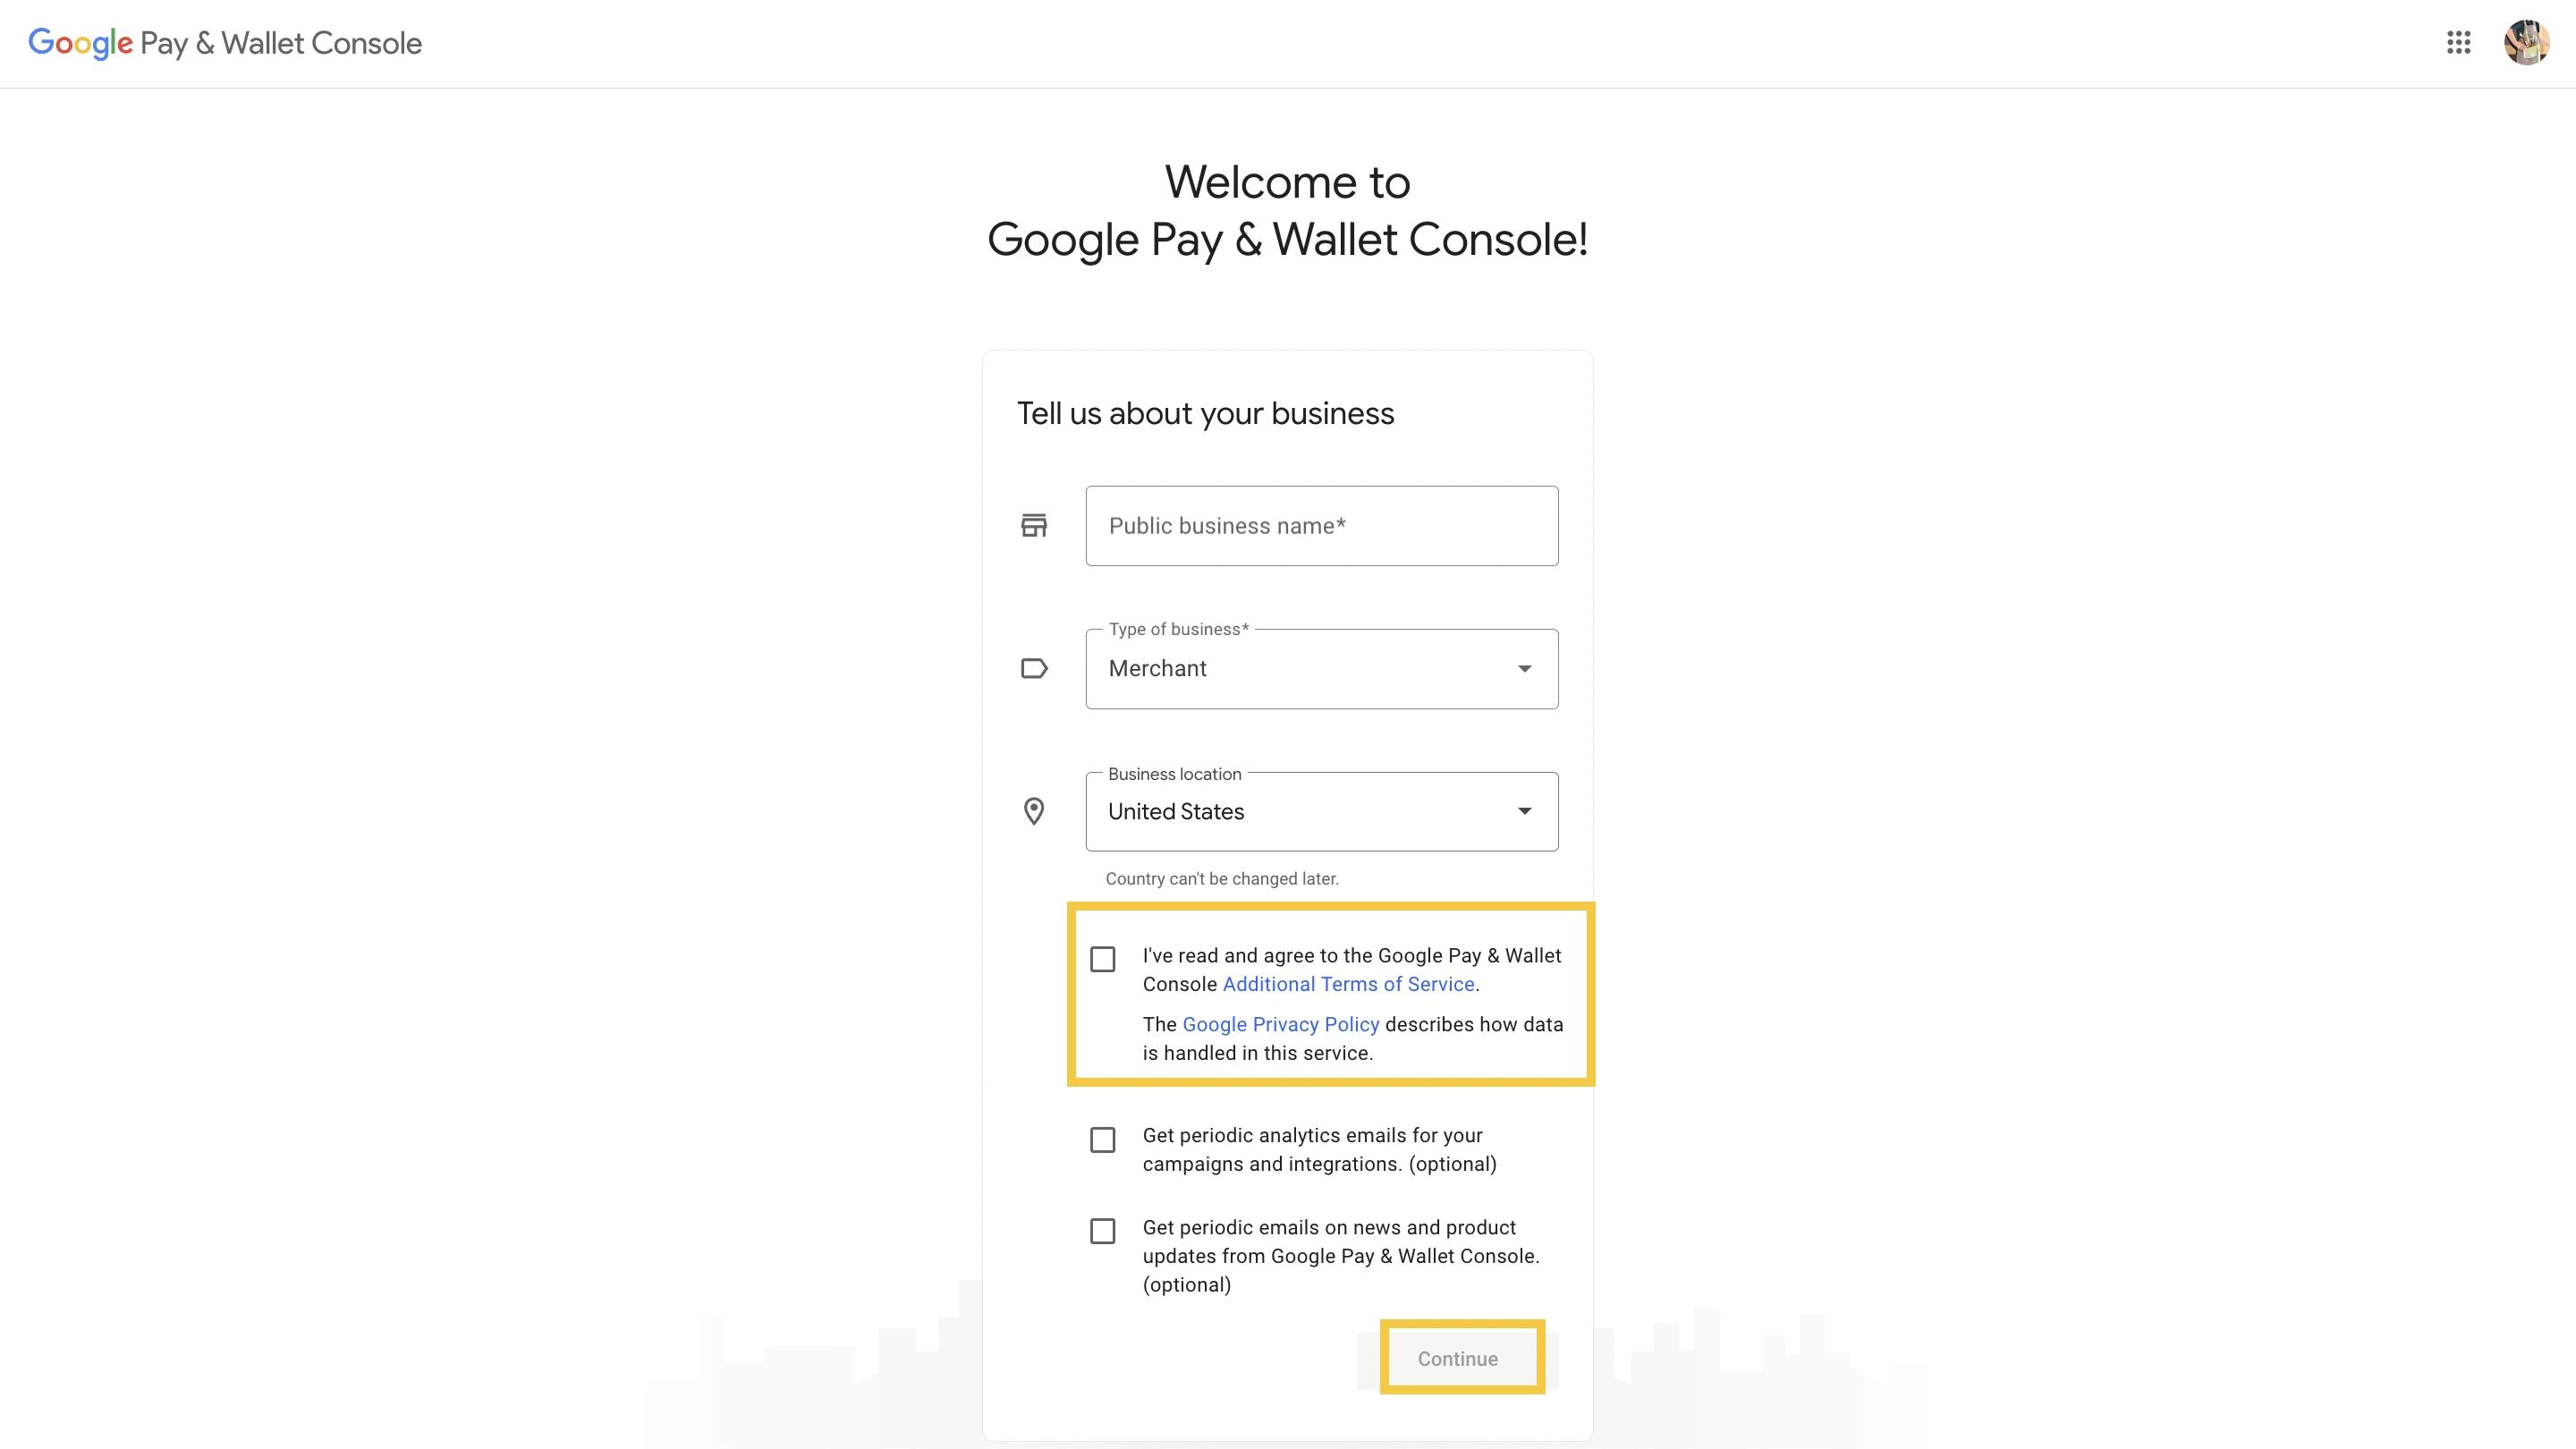
-
Check the box to accept the terms and conditions.
-
Click Continue to proceed.
- Confirm Merchant ID:
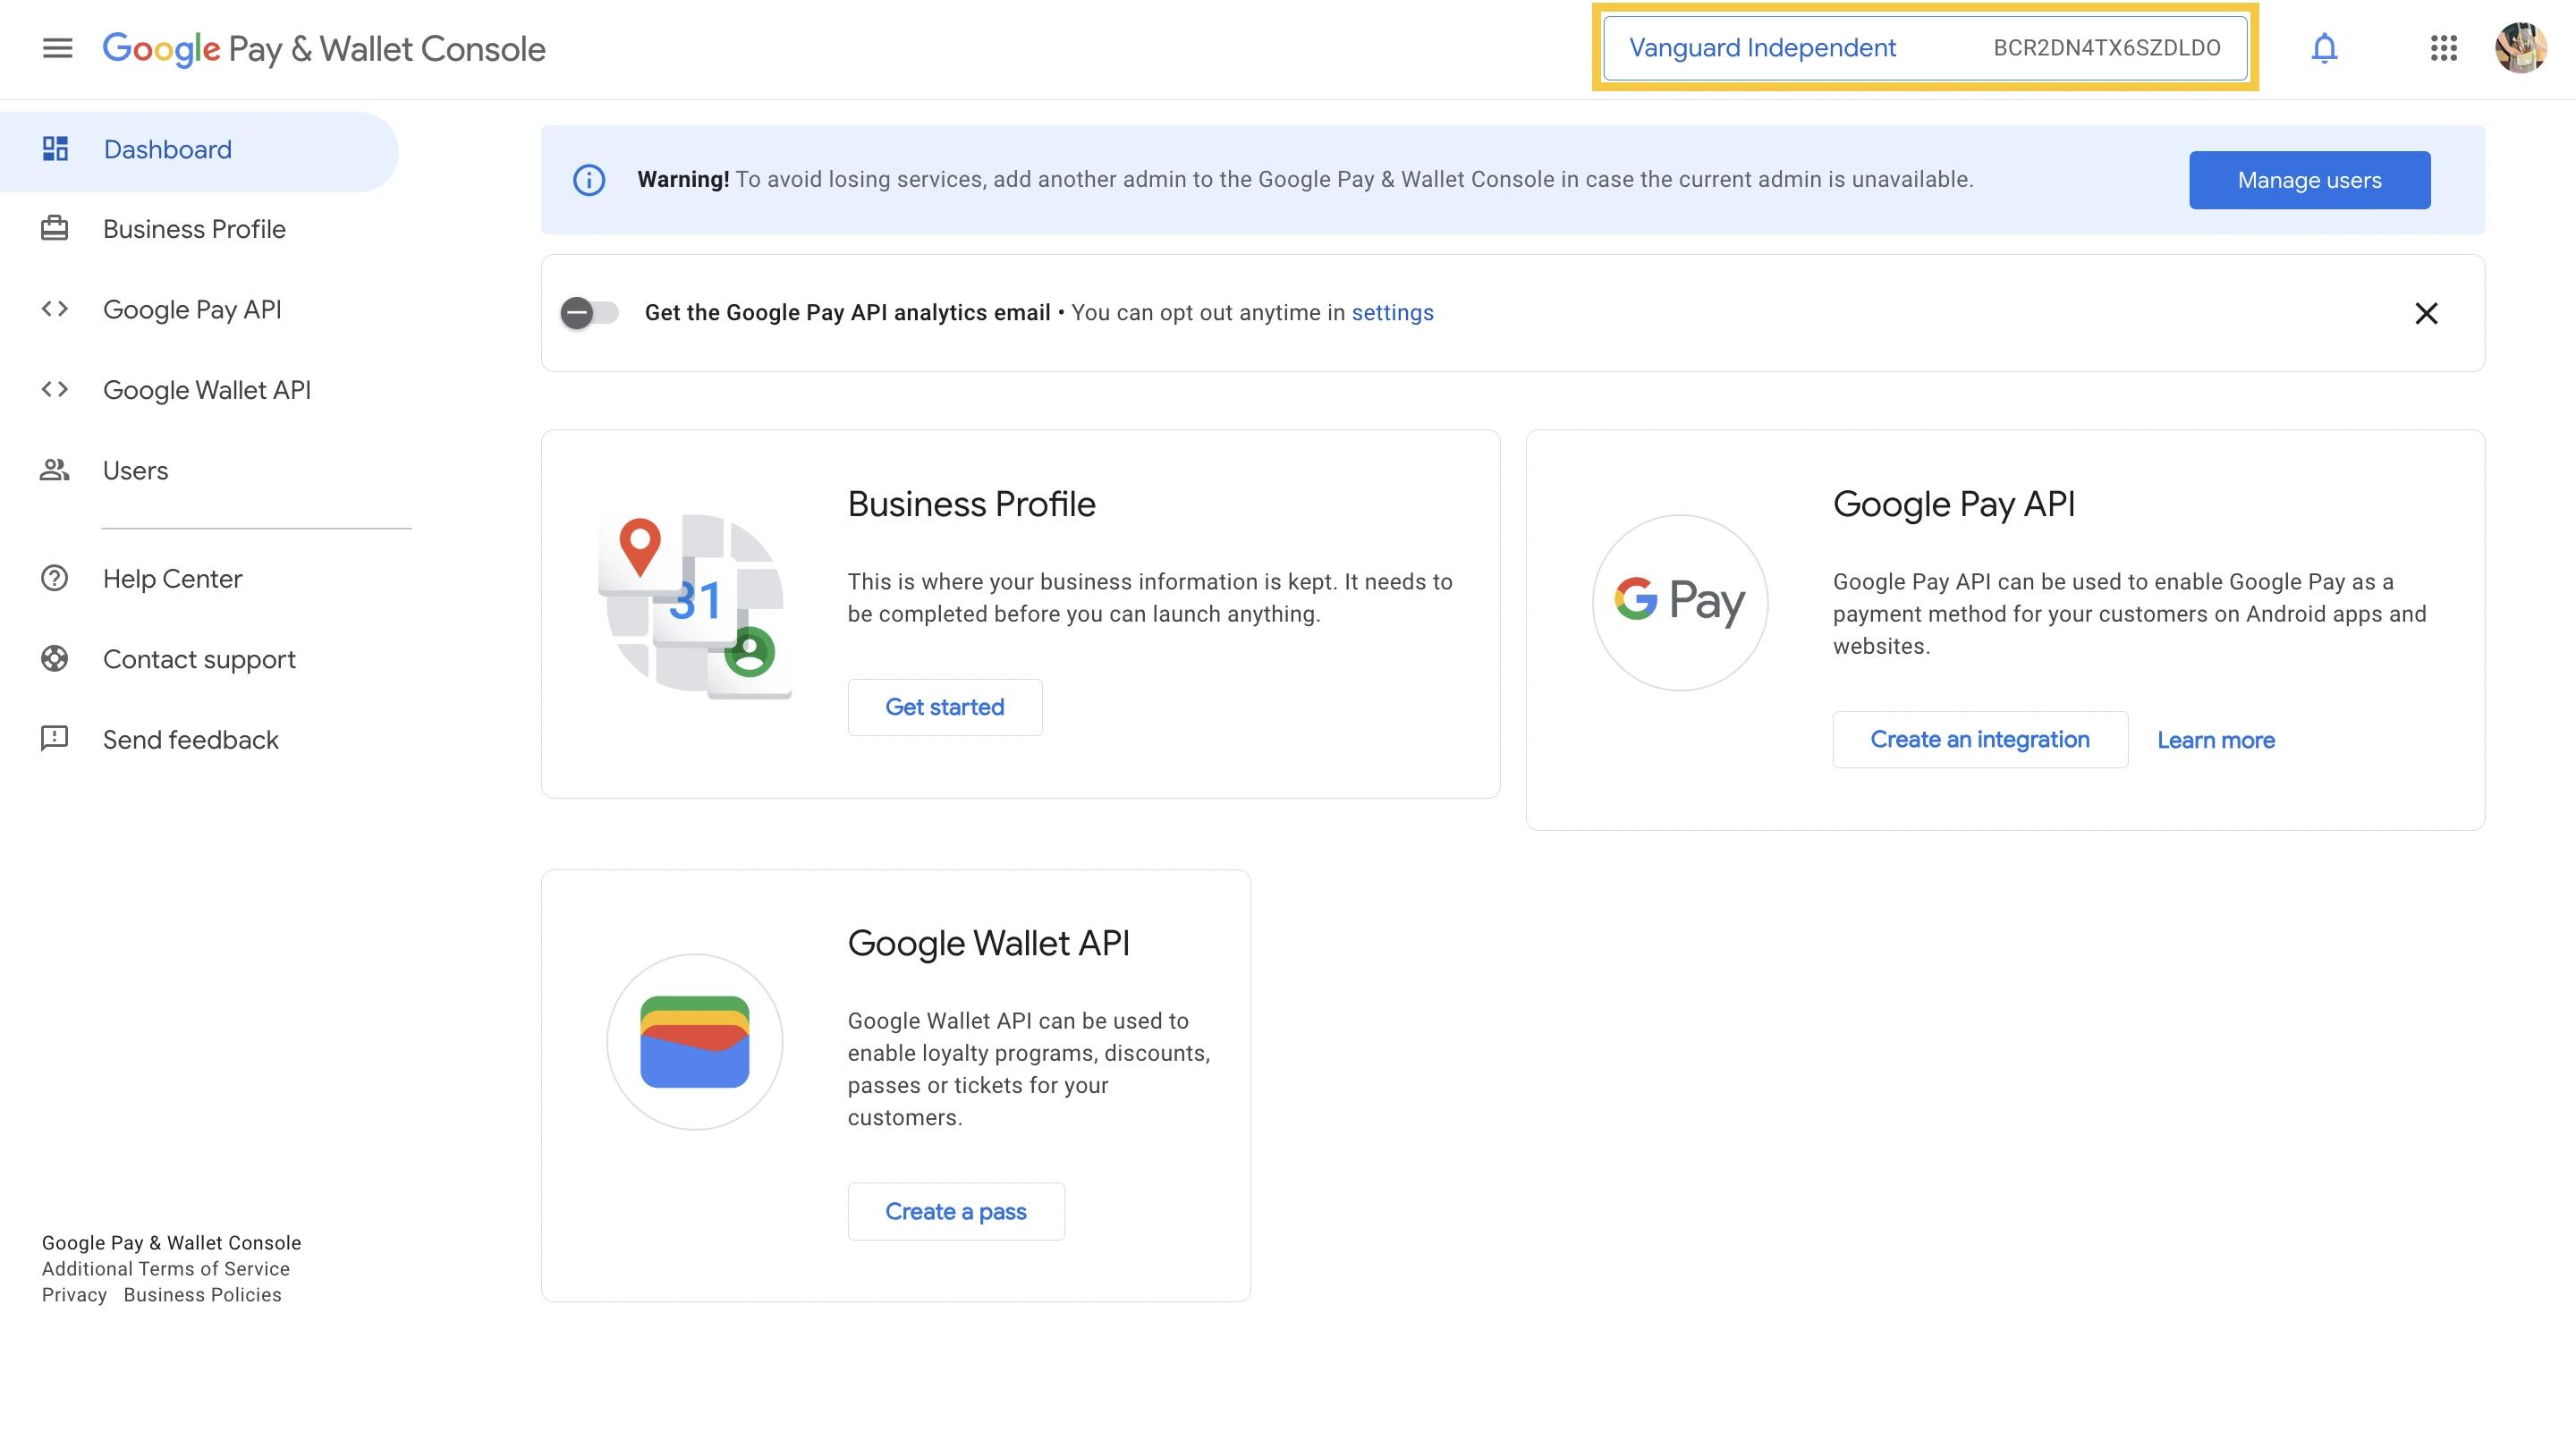
- You will receive an email confirmation with your Merchant ID.
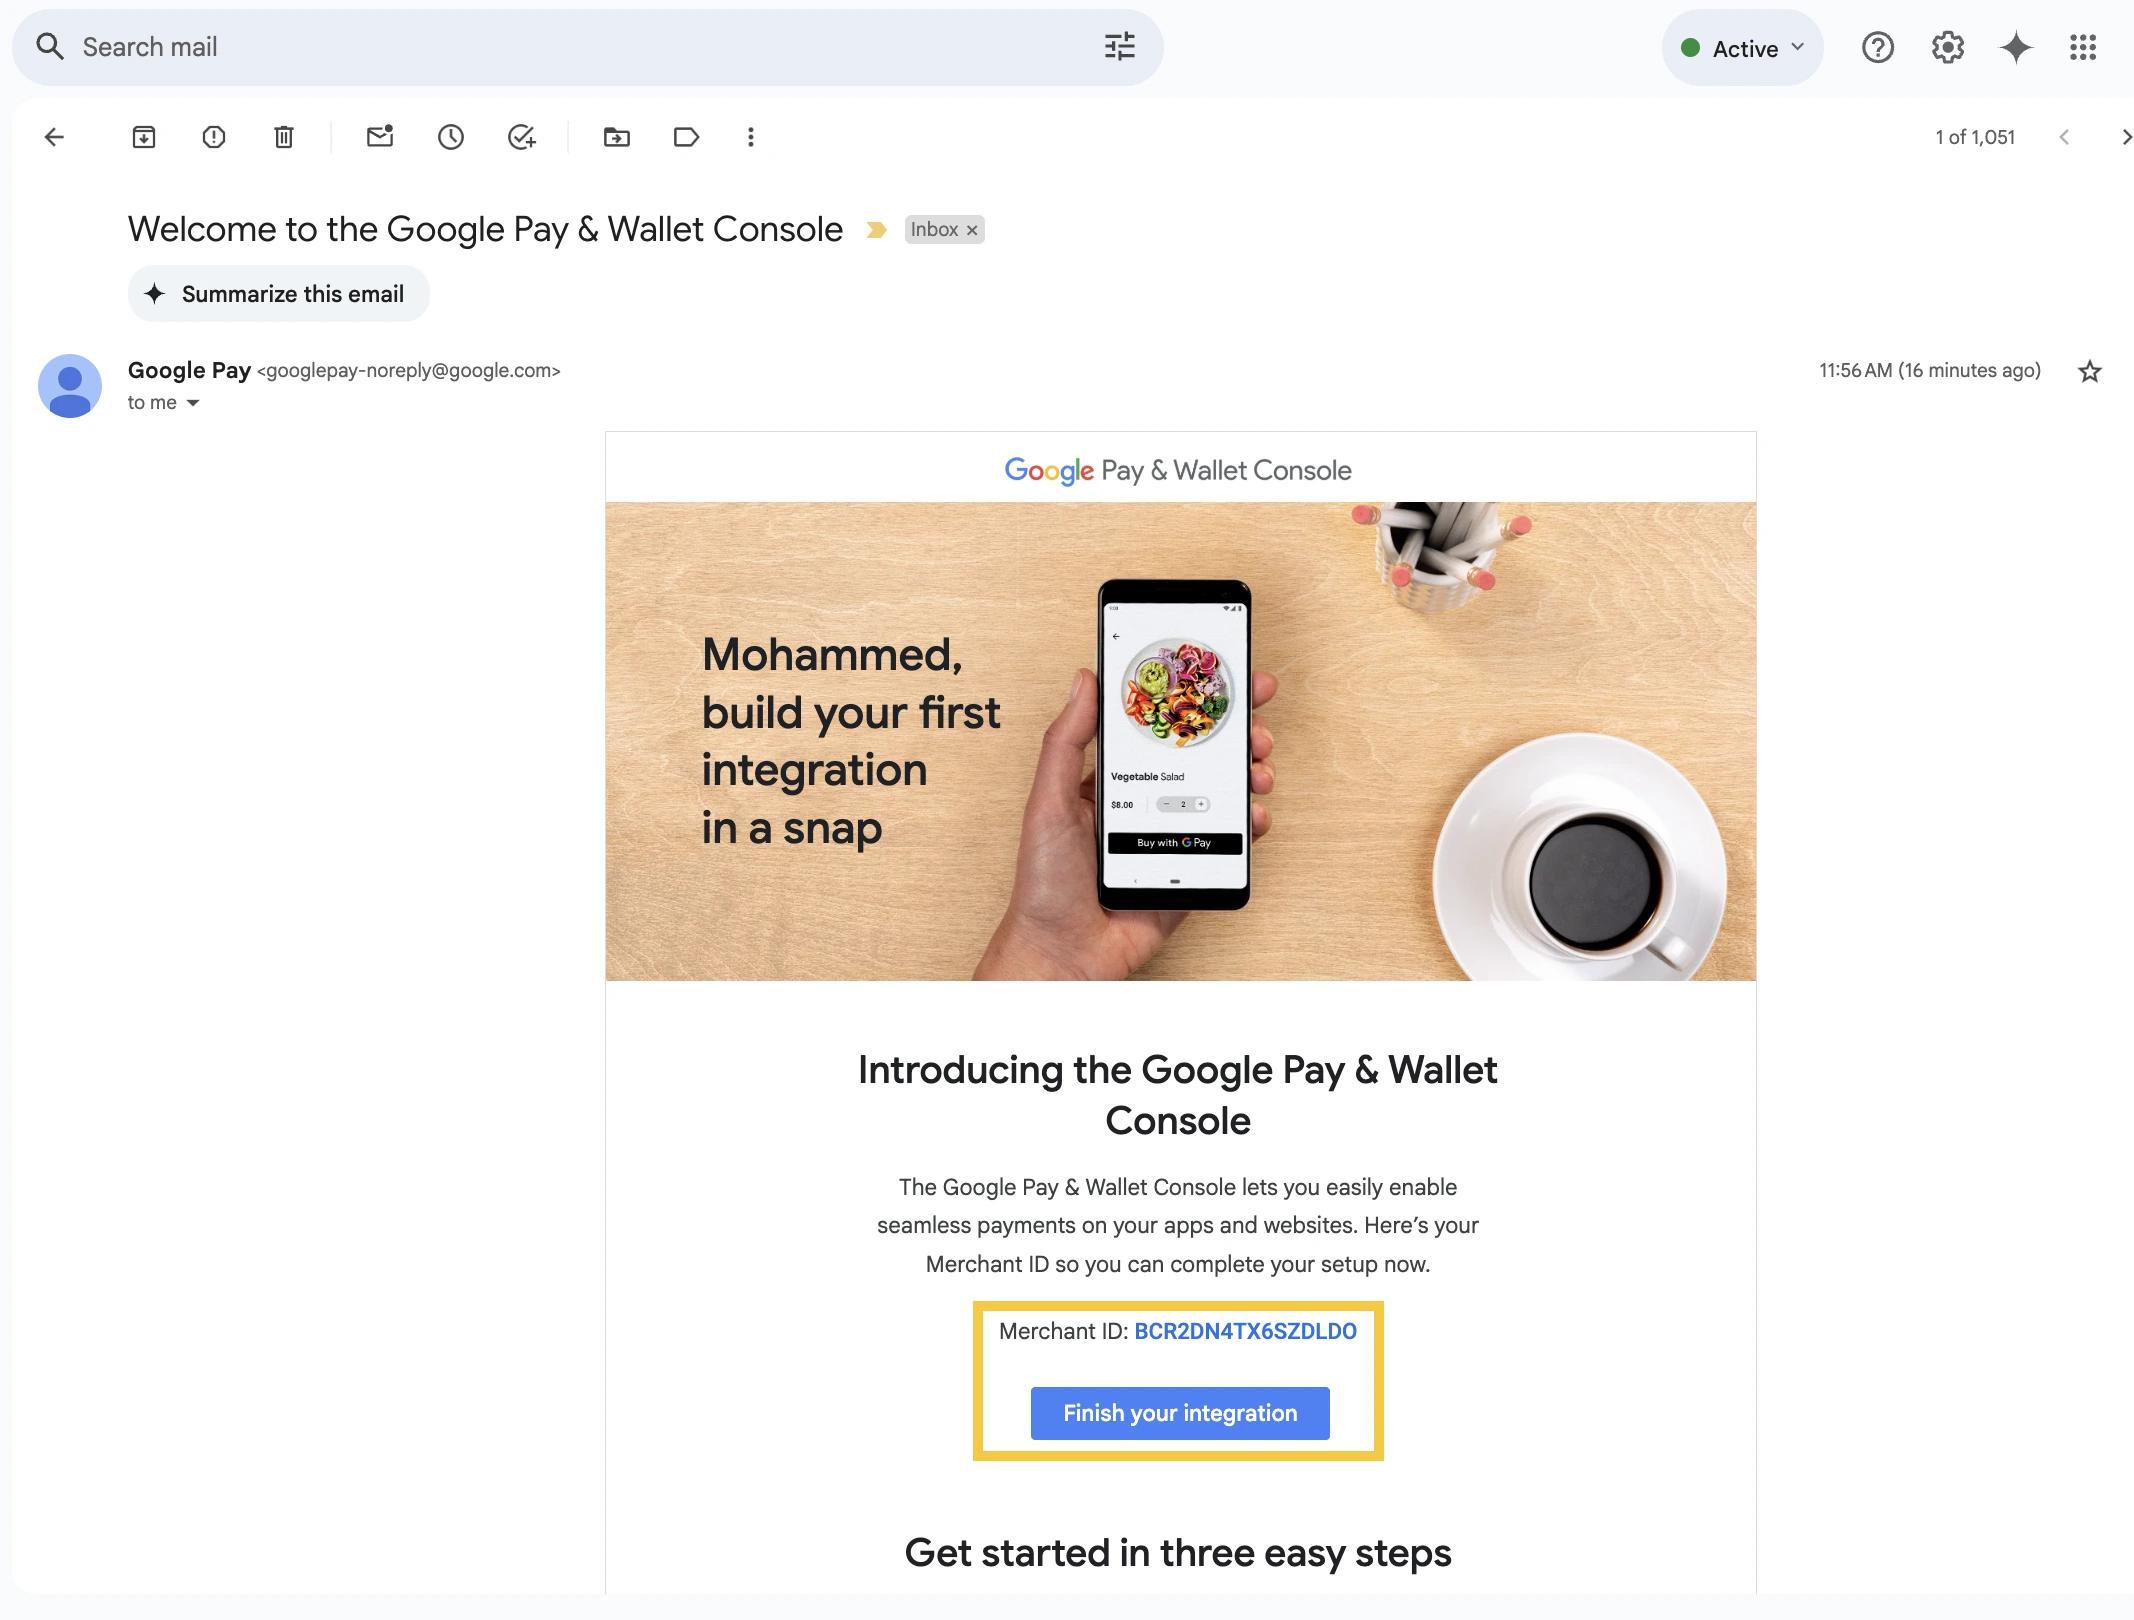
- The Merchant ID is also displayed in the top-right corner of the dashboard. You can click on the business name for an expanded view.
Google Pay Documentation
Google Pay documentation can be found here. These documents are maintained by Google and will be kept up to date with any changes and enhancements to the Google Pay SDK.
Setting Up Your Merchant Account
When setting up your merchant account in the Google Pay Business Console, Google will ask if you are doing a "Direct" or "Gateway" integration. You should select "Gateway."
The SDK will then ask you to provide the following values:
- gateway
- GatewayMerchantID
| gateway | "denovosystempay" |
|---|---|
| gatewayMerchantId | Your "Gateway ID" that is listed in the Account Information section of the merchant portal. |
Features
While Google’s documentation provides specific details for using the Google Pay SDK, this is an overview of what the integration process and user flow should look like.
- Your application will render the Google Pay button using libraries provided by Google Mobile Services.
- If the customer taps on the Google Pay button, the Google Pay SDK will open an interface for the customer to select their payment information.
- The user confirms their payment information, which closes the interface and returns the user to your app.
- Your app will receive a tokenized version of the customer’s payment information from the Google Pay SDK.
- This tokenized payload should be passed to the gateway for decryption as part of your Payment API request.
| Variable Name | Description |
|---|---|
| googlepay | The encrypted token created by the Google Pay SDK. |
Example Input
{
  "signature": "MEUCIQCtVnDM3g+pmuYFgcr9UyuqZO0e6DGxnXBTtETXsY1xAwIgWWdONp8G3yvQtQrKmLPrddcu4iAx7QezhCCNrdj2K4Q==",
  "intermediateSigningKey": {
    "signedKey": {
      "keyValue": "MFkwEwYHKoZIzj0CAQYIKoZIzj0DAQcDQgAEqveoNBmTTrV8O+fjWAVn0o9hnM1LBtRs1dOSK5E4Qj6CfftS1hy6xCu5uCOog2bdaOJCcC7beuXtKJRcWjnXpA==",
      "keyExpiration": "1731579085000"
    },
    "signatures": [
      "MEQCIA9VmlSZRZuOsezE0EqG29/IDegX94RjUT27FlvBxki4AiBwQ24y93jEpGrVErsUZmWUPGz1Jm8qt3/95wRLP+luHQ=="
    ]
  },
  "protocolVersion": "ECv2",
  "signedMessage": {
    "encryptedMessage": "8wIQv697YJ2DllGSmXr55ACzBYoAbFZV4/01Kfp5UbyKNIVC2yNI7X/3XOhs5SSSmR4zBxjgWi6LiBO9aZkmpRrgzGoolJ0kxJXQbFv9/pnFv5x17qpD41Zmu1U+1Mm9N3SzODDW02yUGHm6H+FsL7NM8cy0LzLnyqeqwlyw3YbCgNZ4QxjPeR17h5IR5o1Om6J1YKjXJSYBHjdw7B/svc9jqOsjOFuXhvoC9+TWFUcrx+7+NExDrWyEs23iDwW5mrHRscRgaDYoxtA9w9NbuNR4OTMq3dVWBdsWDzdfFGZwpvQPTPhVktHX7oZDWbp8kt2TY9m5Gjh4eBAHpC+eIK1ovkfZLNITsz24637GqknwpP3bExJf8n05mqgeZb/CUuhqvU9A7fdjscNTXDwYhPK291LVMulsH66GoxWrW0lD2ZjYz0b8iZlMWeU9qbShjZfBabBLinjS3FdFQdKnadTtv4RYMvj+MjBvIWooLerlP1GPwbHLh7mPQIEJngPW1H2ybF5Omkj+hd7Qxot/xDzPzUILMRuFxdQyfjtZs53FhFAwWst0J7Y==",
    "ephemeralPublicKey": "BH9rqOE/Huj0zmodsp+DR77BpHBtSfXpXYwT4UZmIUJlP0JghqwBTh/v0zOrPp25xSPIKIbxbVOnNuJ2kBxEthA==",
    "tag": "DYC/AIFU8LRHOBZAemcUHQVviQ3vhvwbiwYdTxlavK8=="
  }
}
If both the Payment API request and the Google Pay token contain data, such as the customer's zip code or street name, the gateway will prioritize the value from the Google Pay token since it reflects the customer’s explicit input.
WooCommerce Integration
Merchants who have an eCommerce site built with WooCommerce and want to accept payments on their site without compliance concerns can use the WooCommerce iPOSpays Payment Gateway plugin. It is an easy-to-integrate plugin that allows merchants to accept payments safely and securely while retaining their brand theme and consistency throughout.
Click the link below to learn more about the WooCommerce iPOSpays Payment Gateway plugin and how to integrate Google Pay functionality into it.
iPOS Transact API
The iPOS Transact API empowers merchants to streamline their payment processes by enabling void, full or partial refunds, and sale transactions using card tokens directly from their own CRM or billing software. With this API, merchants can bypass the need to log in to the iPOSpays portal for many transaction types, improving efficiency and integration with third-party applications.
Click the link below to learn more about the iPOS Transact API and how to integrate Google Pay functionality into it.
Last updated on