WooCommerce iPOSpays Payment Gateway
Prerequisites
- For Sandbox (UAT)
Users should be onboarded on the iPOSpays sandbox(UAT) environment as a merchant and have a valid CloudPOS TPN (Terminal Profile Number).
- For Production (Live)
Users should be onboarded on the iPOSpays production environment as a merchant and have a valid CloudPOS TPN.
If you do not have a CloudPOS TPN, contact your ISO or relationship manager.
Get Started
Watch the video below for a step-by-step guide on setting up and using the iPOSpays plugin for WooCommerce
Installing the Plugin
-
Log in to your WordPress account.
-
Navigate to Plugins → Add Plugin..

- Search for "iPOSpays Gateways WC".

-
Click Install Now.
-
Once installed, click Activate.
-
You'll be redirected to Plugins → Installed Plugins.

-
Search for “iPOSpays Gateways WC” in the search box.
-
If you want to get the latest updates automatically, enable auto-updates. When enabled, the updates will take effect after 3 hours.

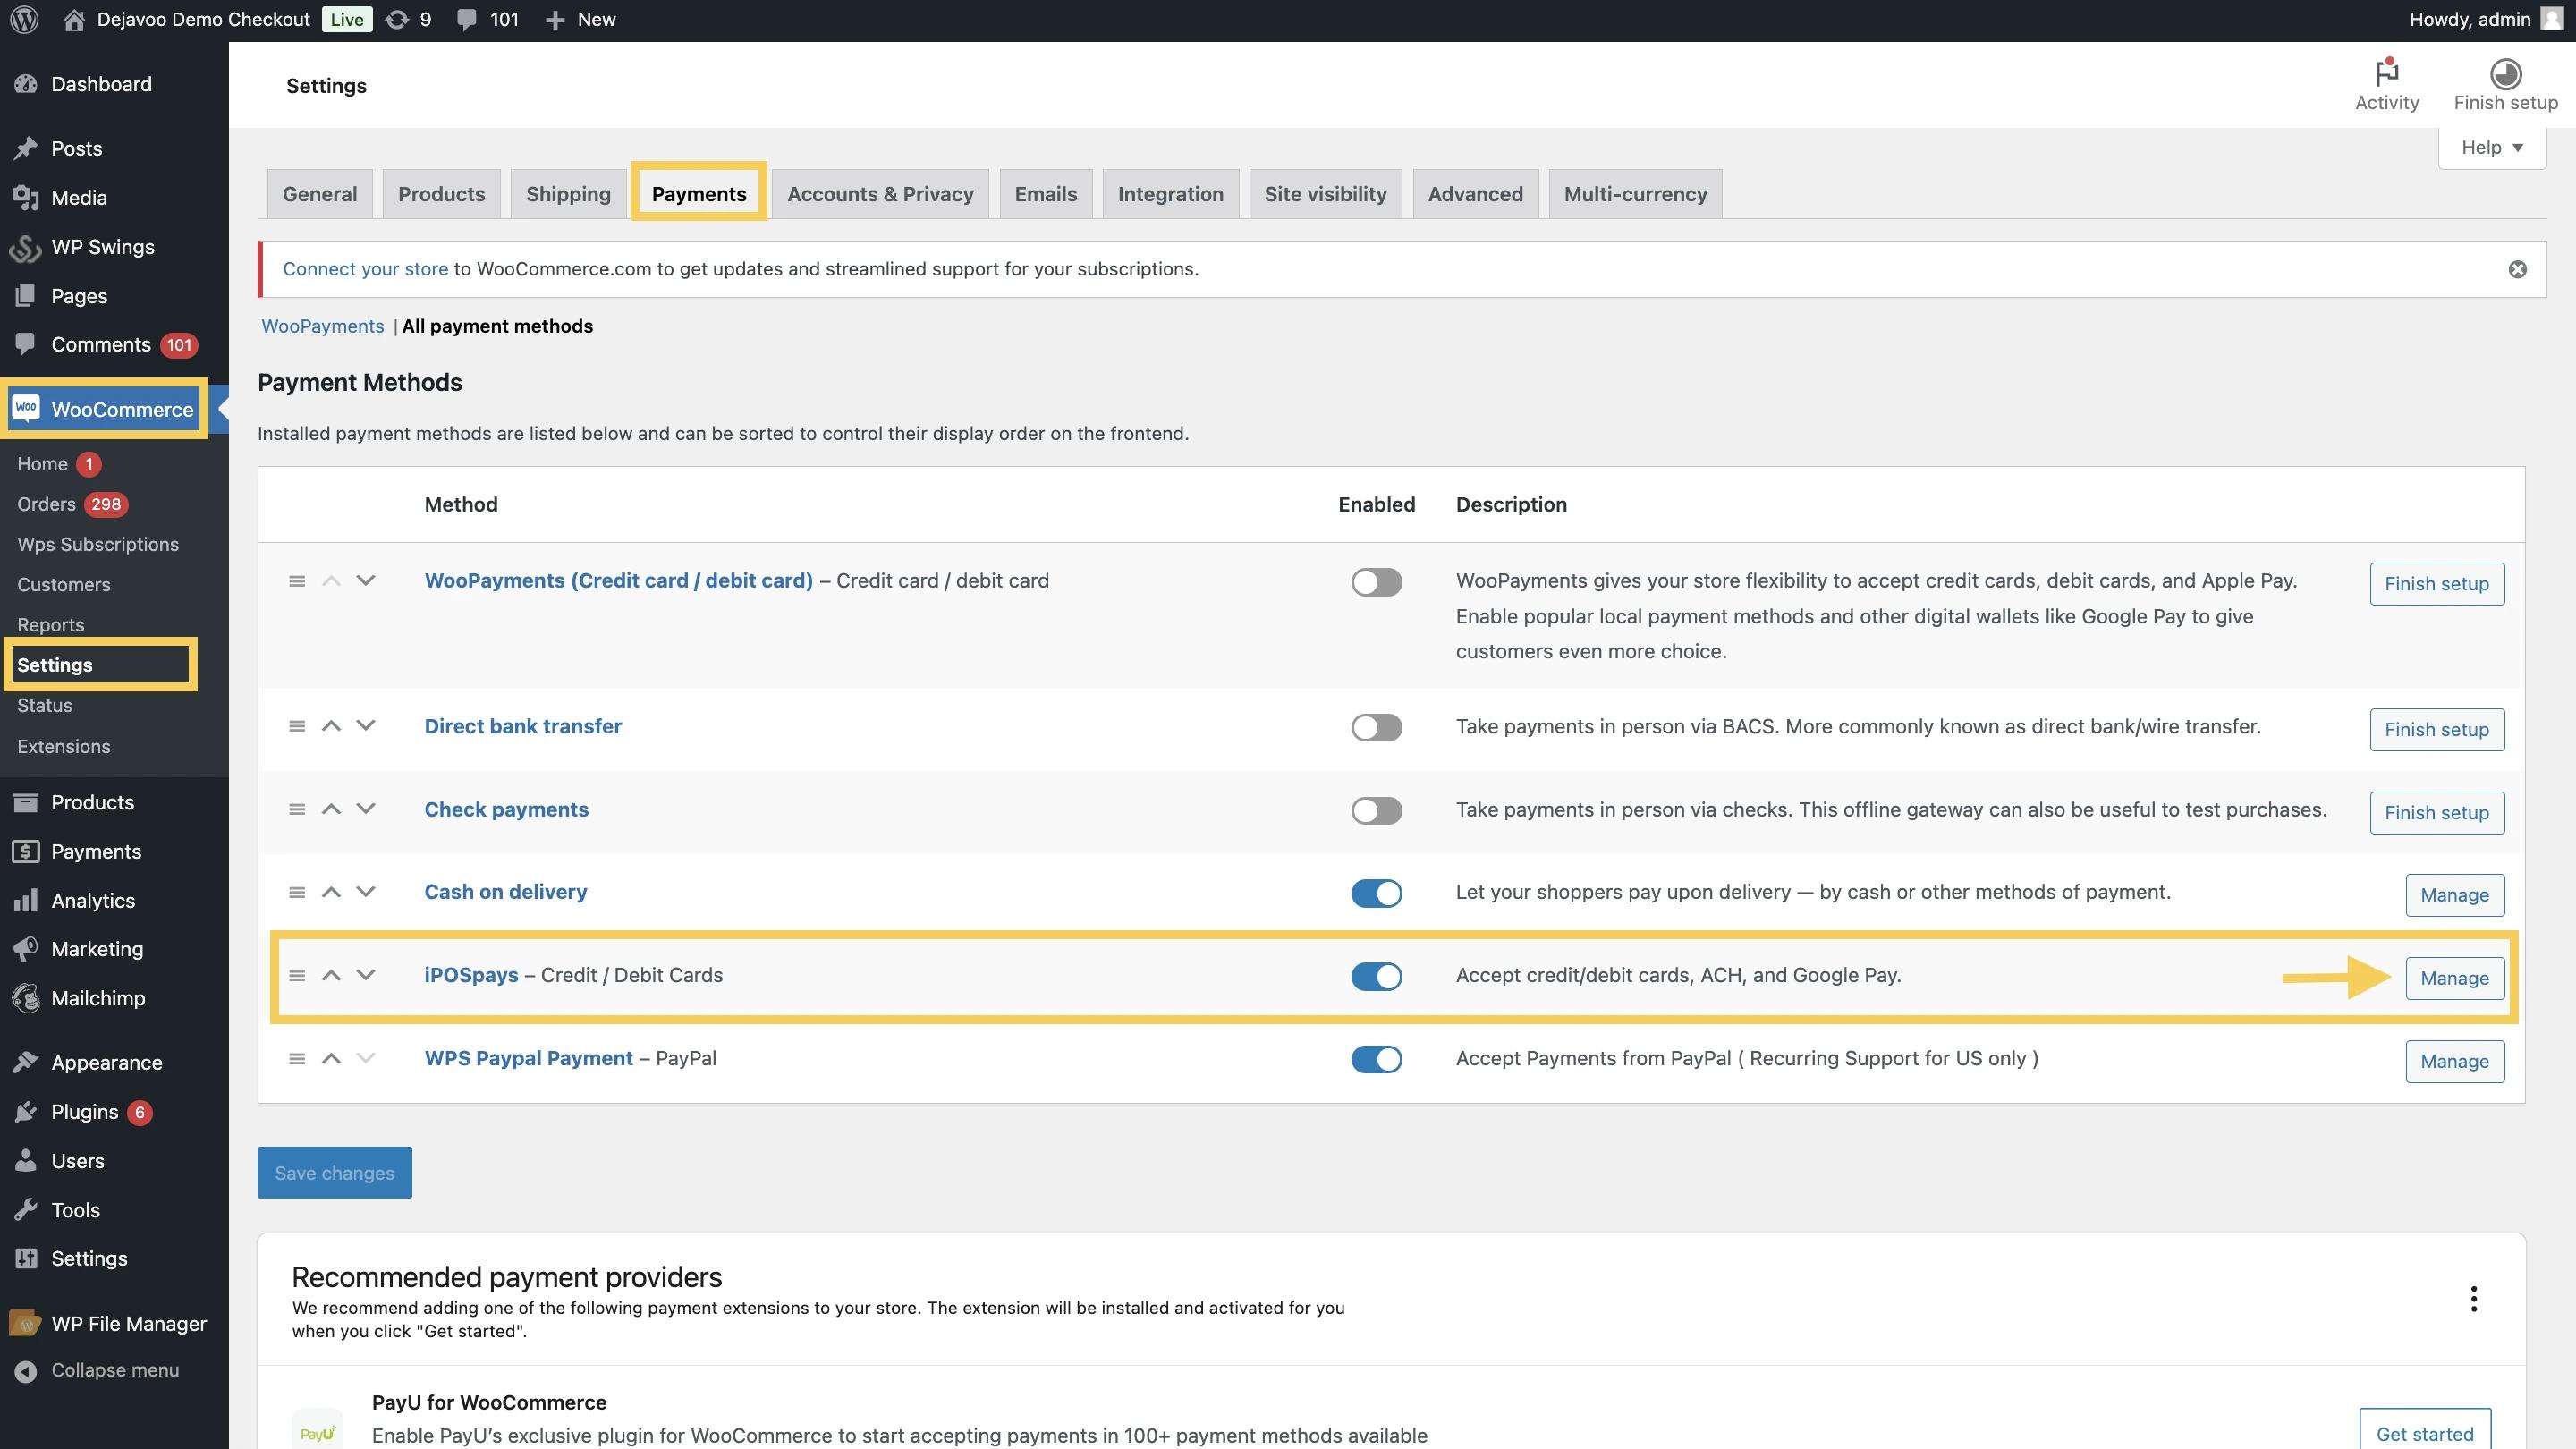
- Click Settings to configure your iPOSpays plugin.
Configuring Your iPOSpays Plugin
The WooCommerce support team does not provide technical assistance for iPOSpays accounts and cannot help with account-related inquiries. If you need support with your iPOSpays account, please contact iPOSpays directly.
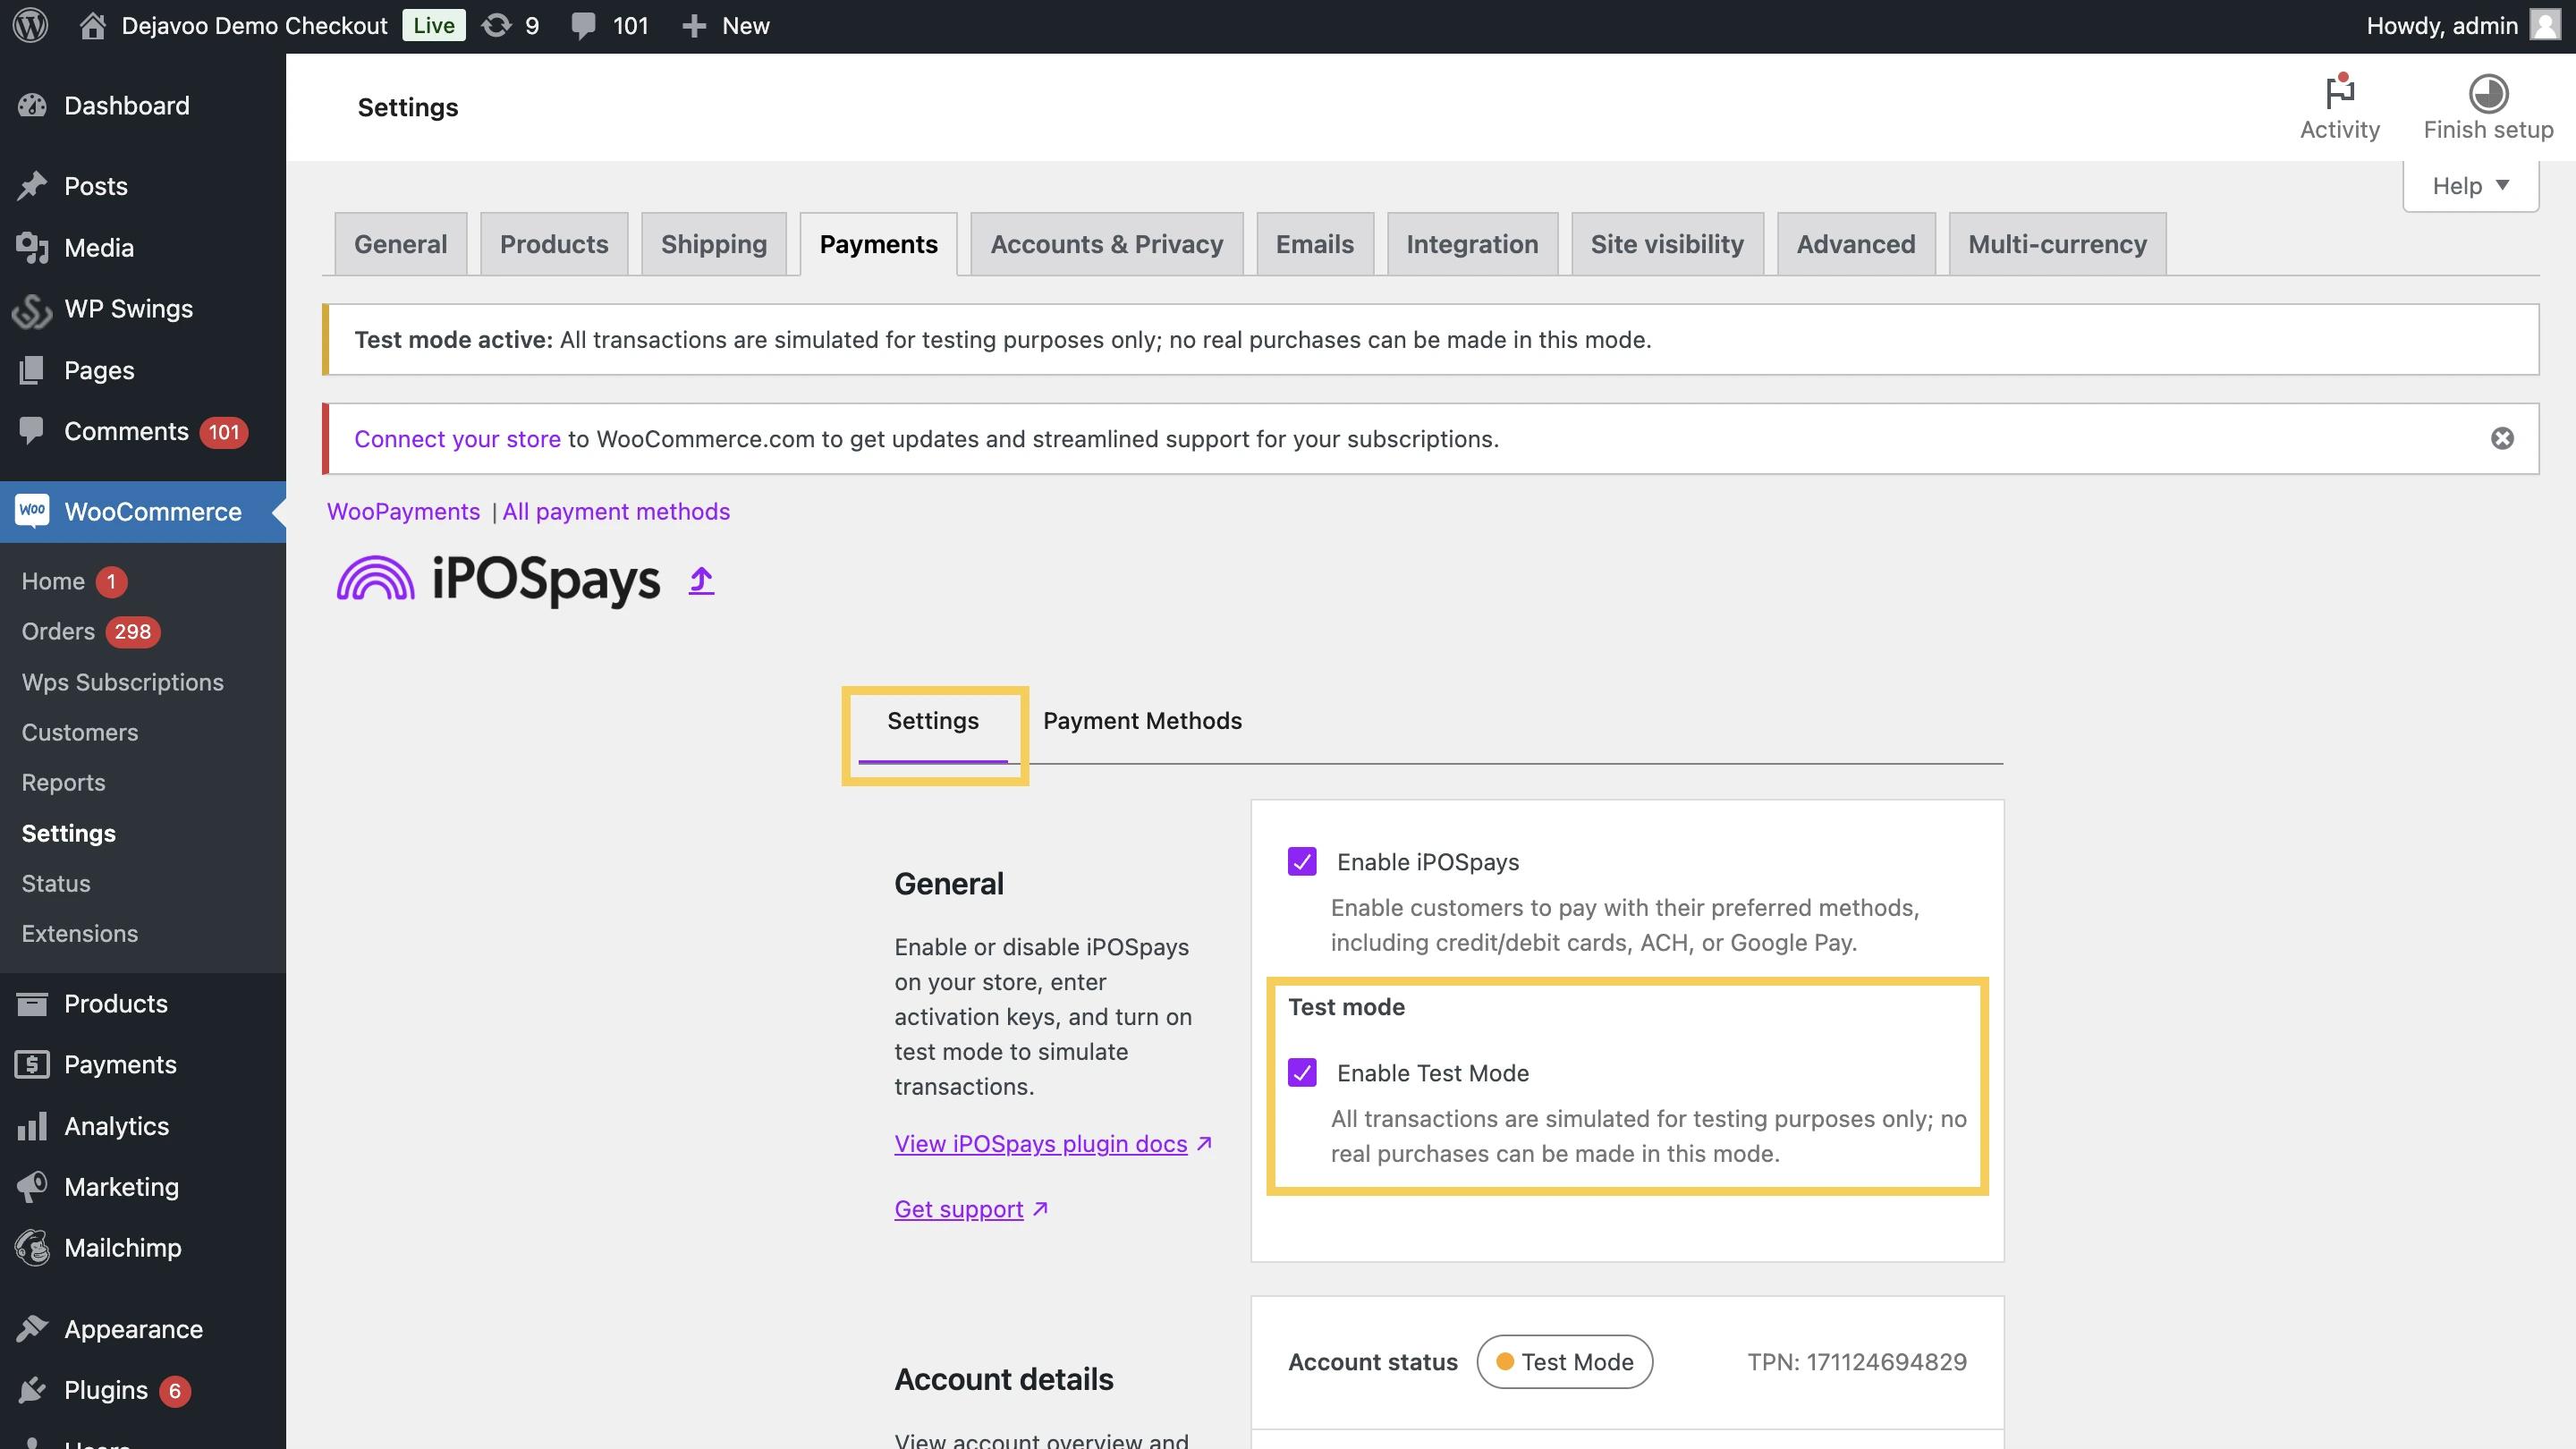
- Under the Payments tab, enable iPOSpays to display it on the checkout page.

Enable Test Mode to use the plugin in a UAT or sandbox environment. Disable it when switching to the live production environment.
-
In the Account Details section, click Edit Account Keys.
-
Enter the following details:
-
API Key
-
CloudPOS TPN → Enter the TPN associated with the store that has WooCommerce enabled.
The ISO must generate API and Secret keys from their iPOSpays account.
Once the keys have been generated by the ISO, they can either be shared directly with the merchant, or the merchant can log in to their own iPOSpays account, navigate to Settings → WooCommerce, and copy the API and Secret Keys from there.

Make sure the mode you select matches the type of credentials you enter.
-
Live Mode: If you’re using the plugin in Live Mode, ensure that Test Mode is turned off. You’ll see fields labeled LIVE API KEY, LIVE SECRET KEY, and LIVE TPN. Only enter your live credentials here. Test credentials will not work.
-
Test Mode (Sandbox/UAT): If you’re testing in a Sandbox or UAT environment, enable Test Mode first. The fields will switch to TEST API KEY, TEST SECRET KEY, and TEST TPN. Only enter your sandbox credentials here. Live credentials will not work.
- Click Activate to complete the connection.
Payment Page Types

Choose how the payment experience appears to customers:
Embedded Payment
-
Displays the payment form directly on your website.
-
Supports Credit/Debit Cards and Google Pay.
Redirect Page Payment
- Redirects customers to a secure, hosted payment page based on the CloudPOS TPN parameters configuration.
Customizing Embedded Payment Options
Credit/Debit Cards
-
Enable the Credit/Debit Cards checkbox.
-
Click Customize to edit the display name and description.

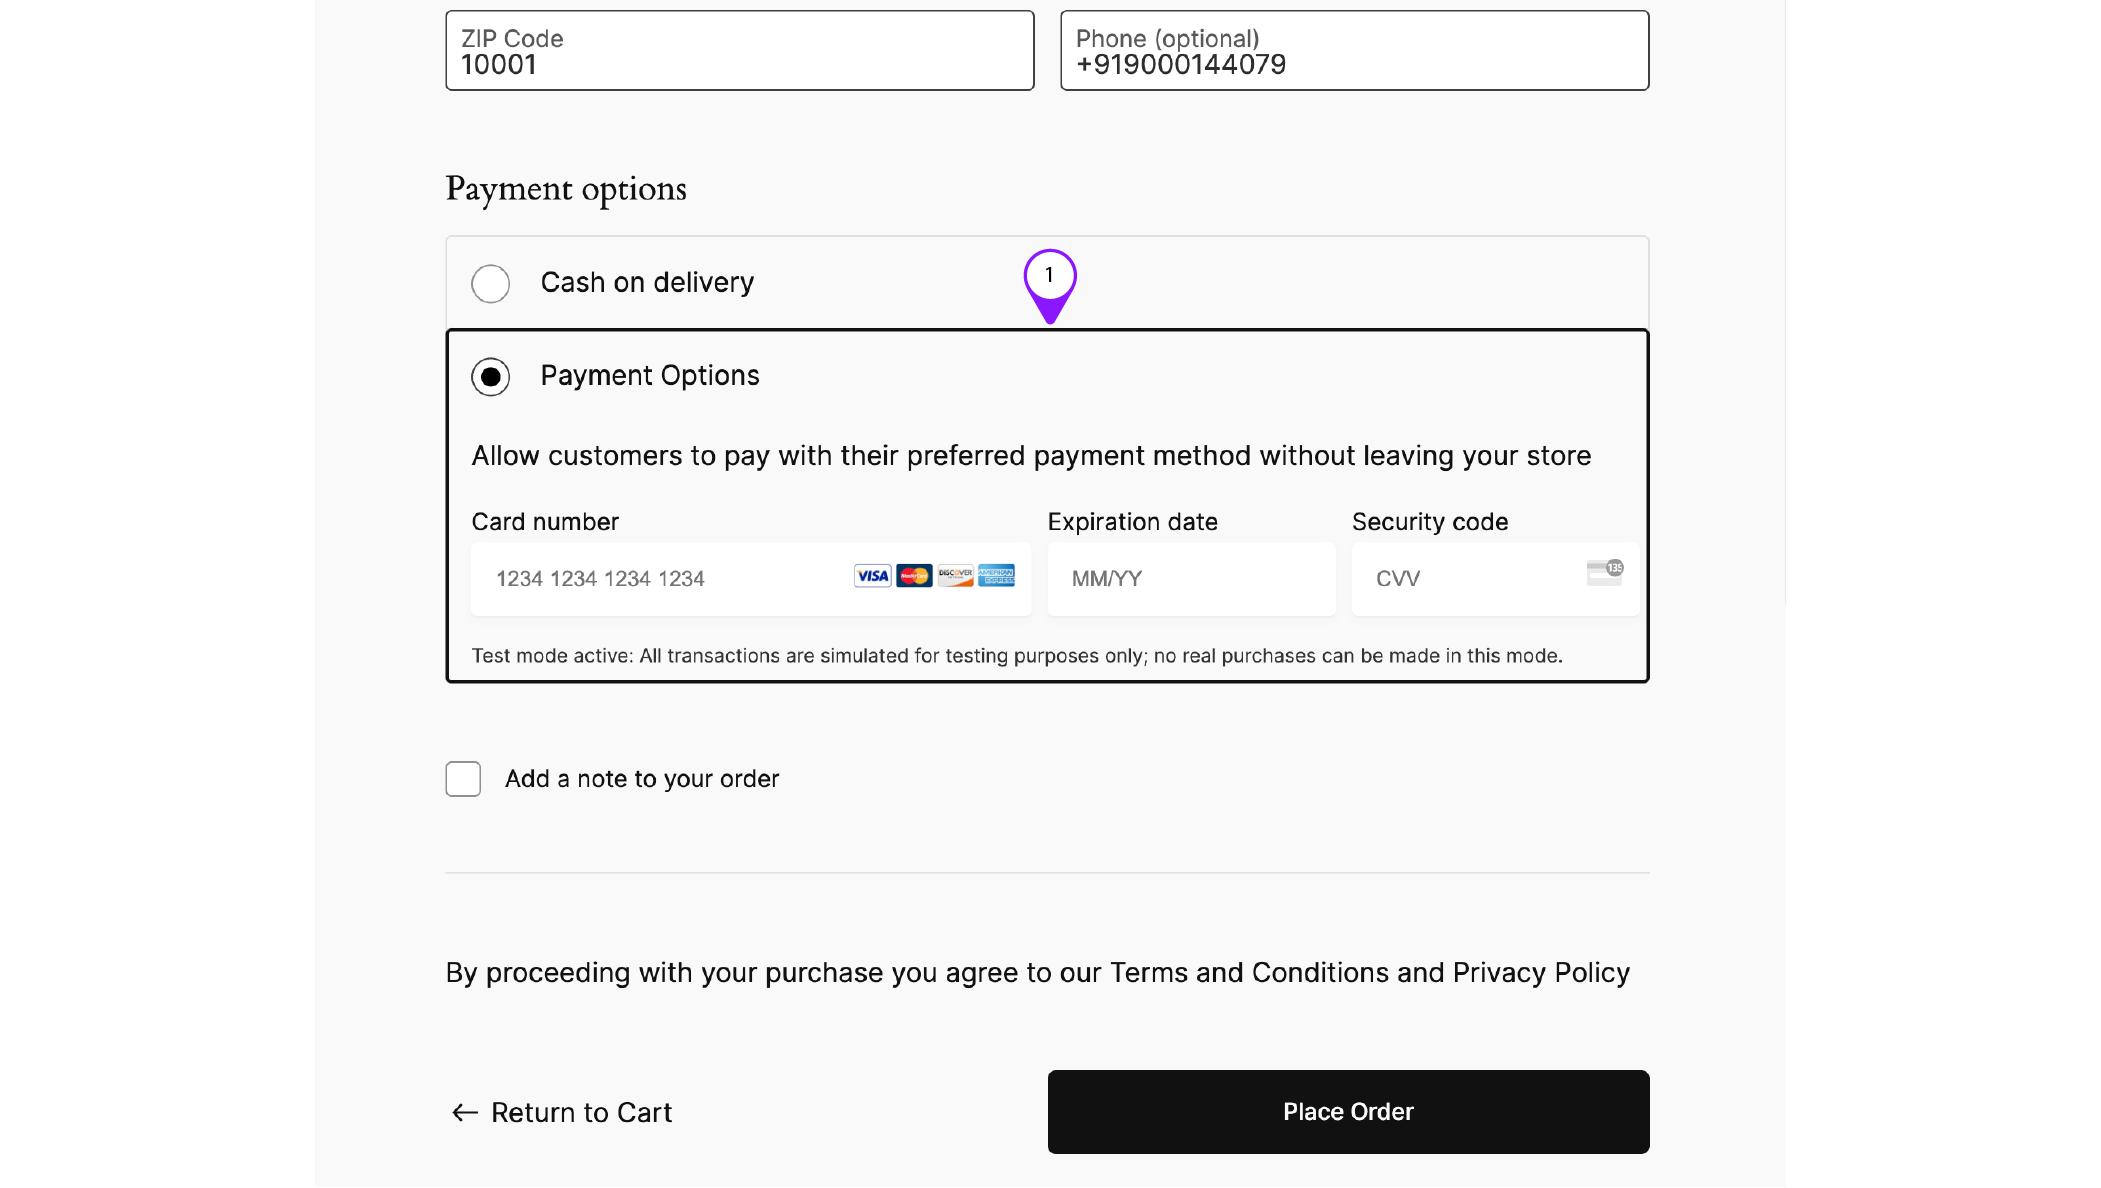
- The page should look like this:

Google Pay
Requirements to integrate Google Pay:
To enable Google Pay on your payment platform, ensure the following prerequisites are met:
-
Google Merchant ID – Required to process Google Pay transactions.
👉 Create and verify your business on Google Business Profile to generate one.
-
Processors Supported – TSYS and Elavon
-
CloudPOS Compatibility – TPN Build 10114 or higher
-
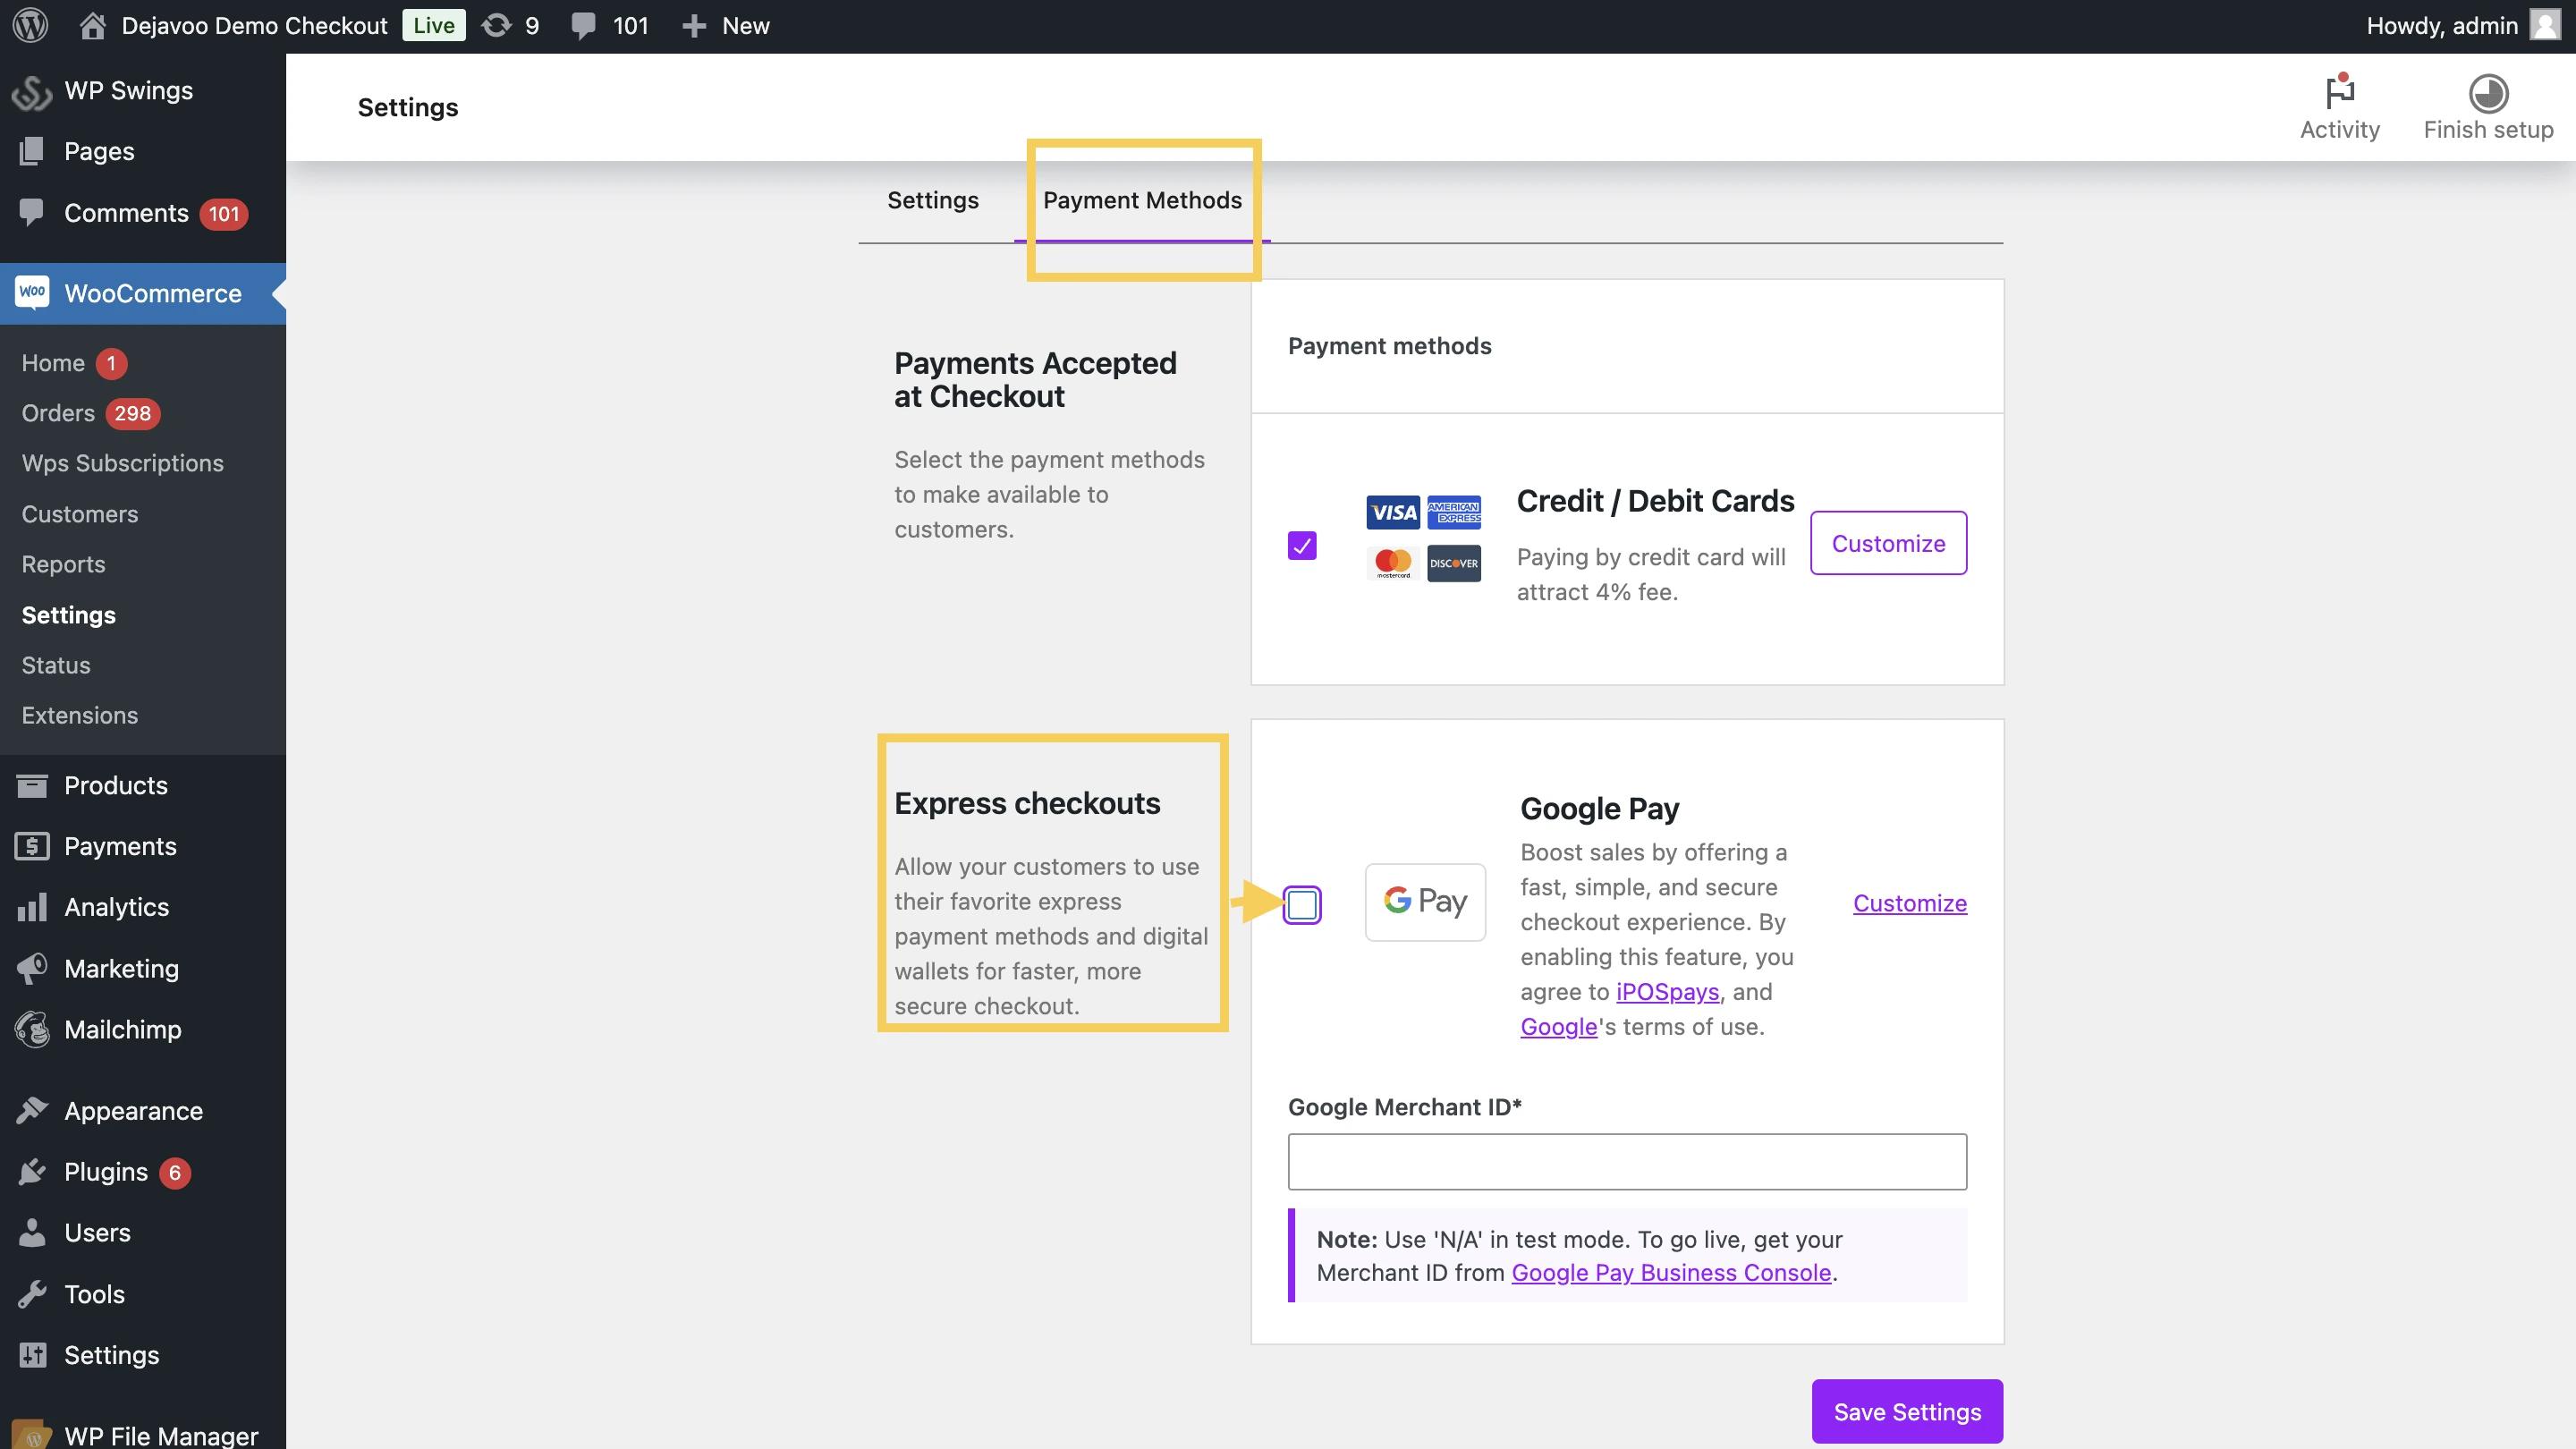
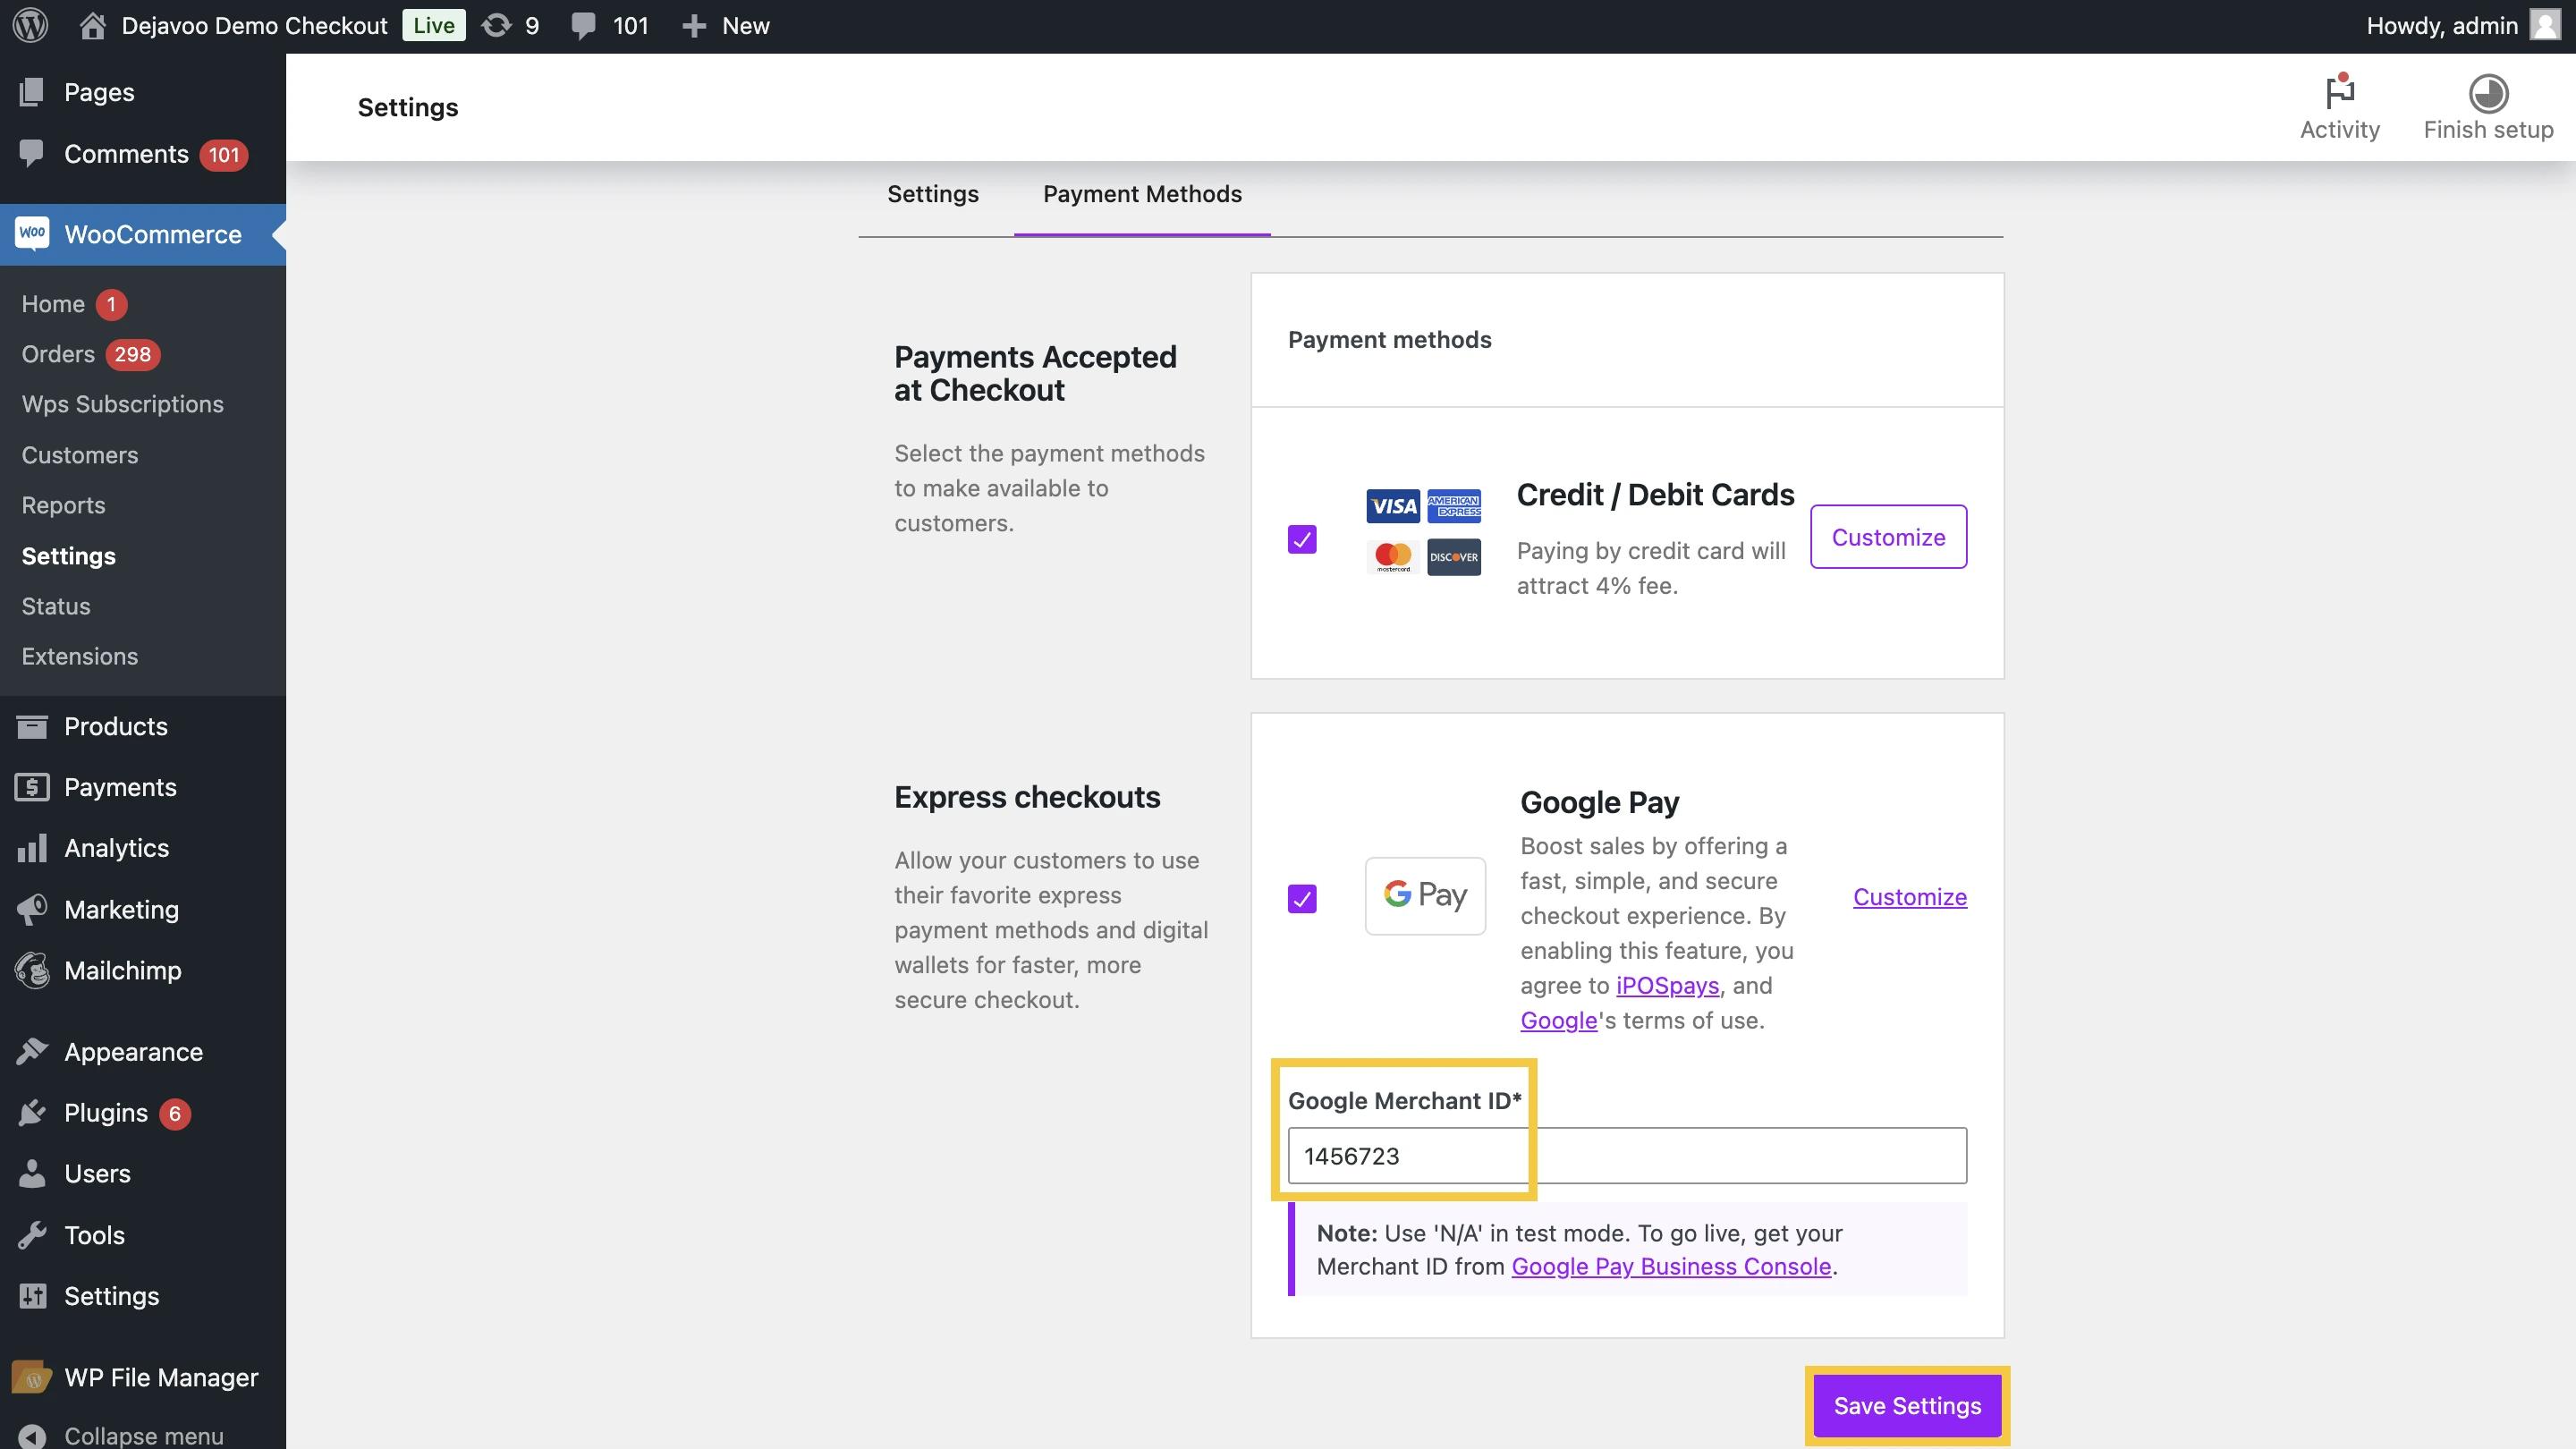
In the Express checkouts section, enable the Google Pay checkbox.
-
Enter your Google Merchant ID:
- For Test Mode: Enter "N/A" (no spaces). (This is pre-filled by default.)
- For Live Mode: Enter your actual ID from the Google Pay Business Console.

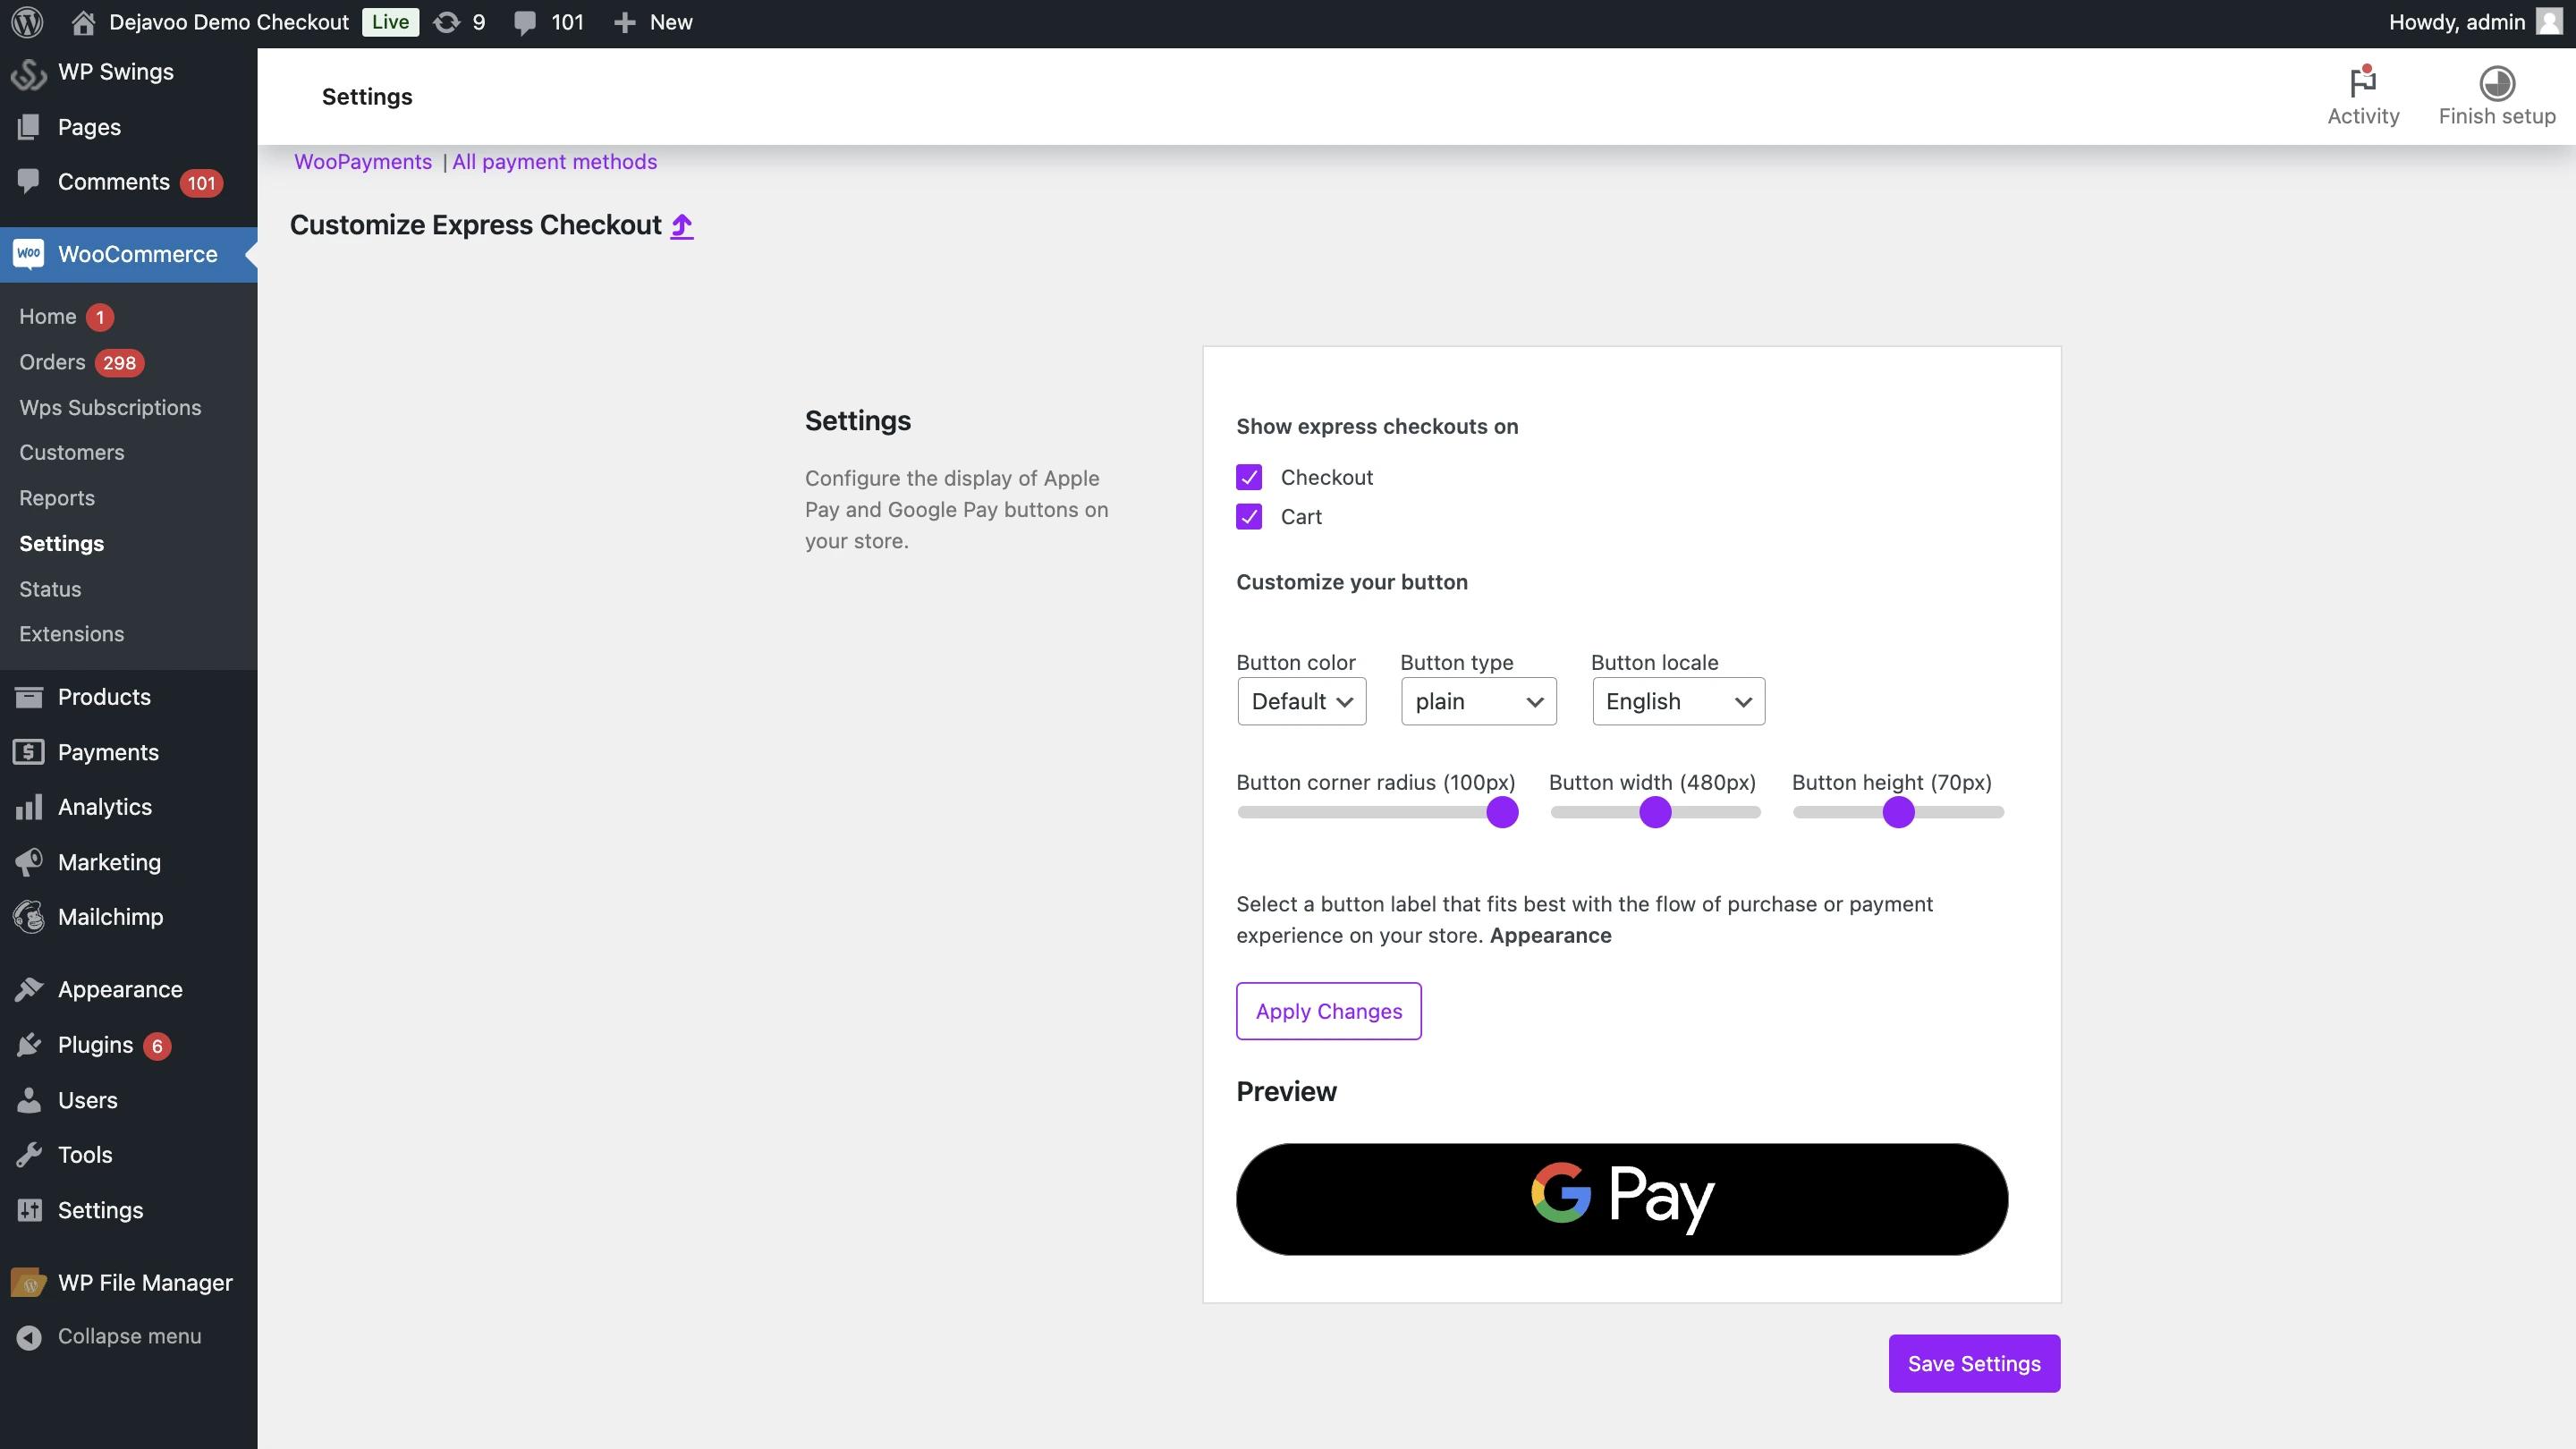
- Click Customize to adjust the Google Pay button design (language, color, font).
-
Click Save Settings to apply changes.
-
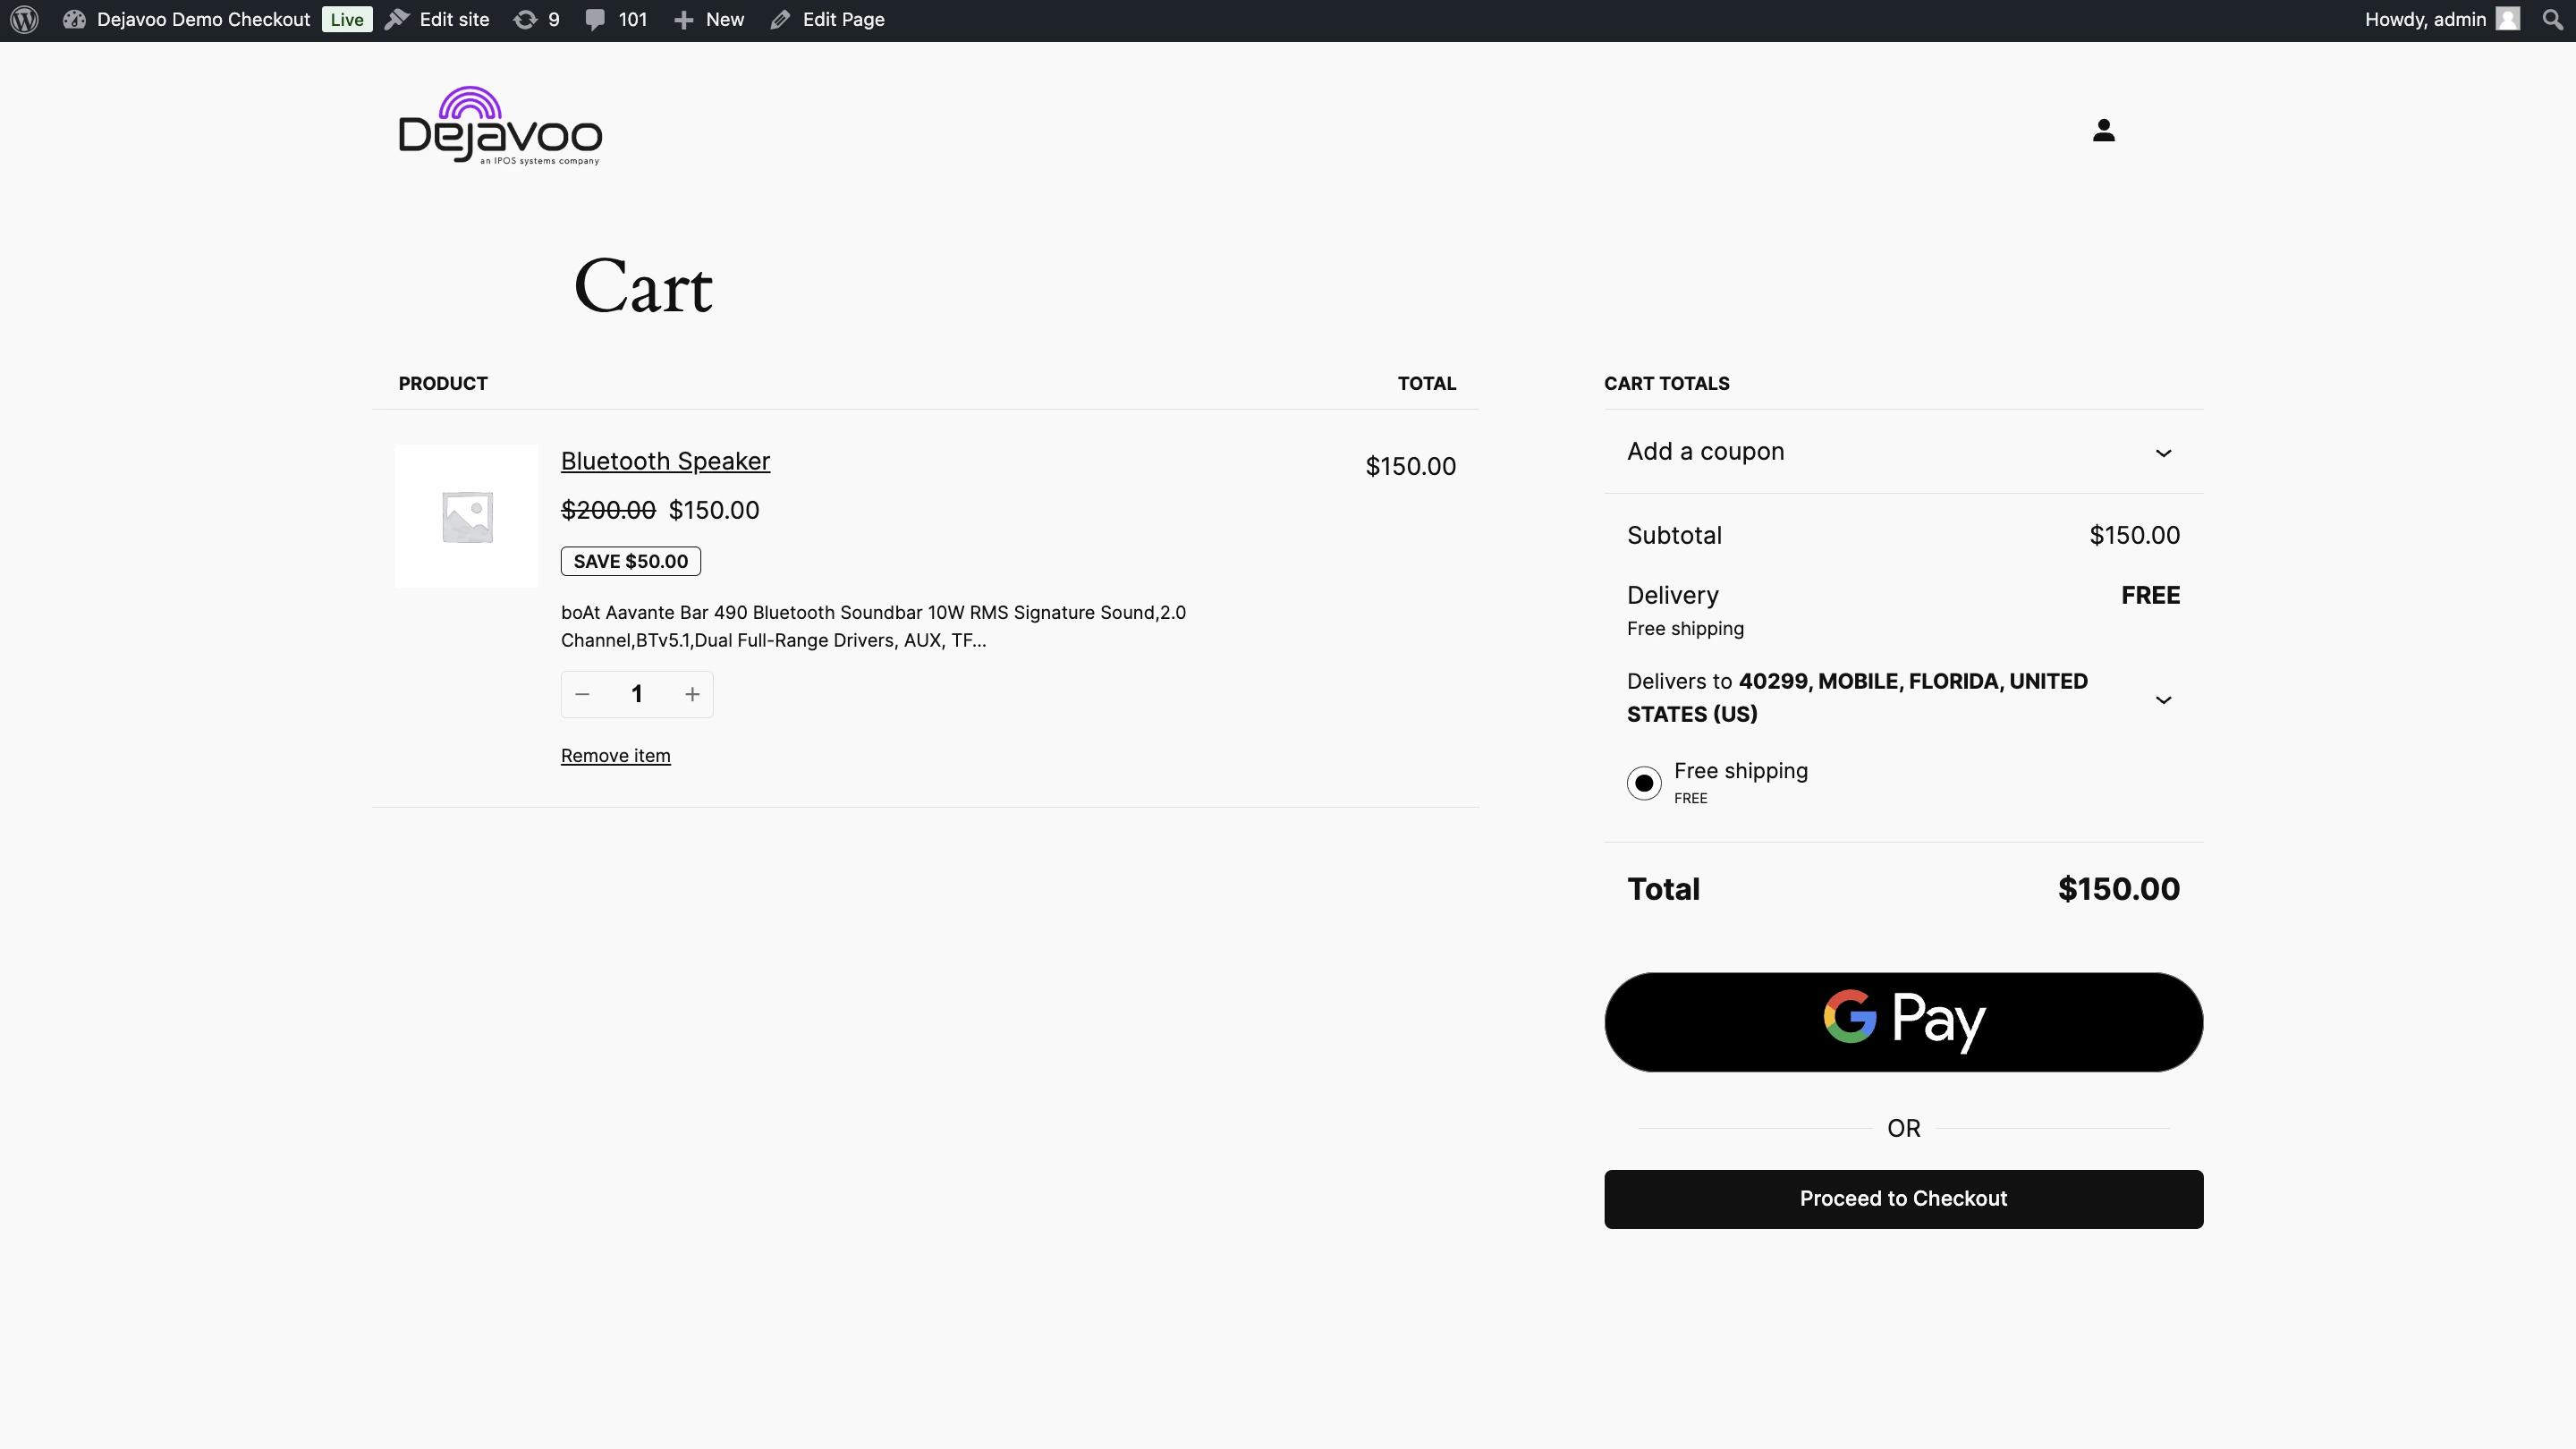
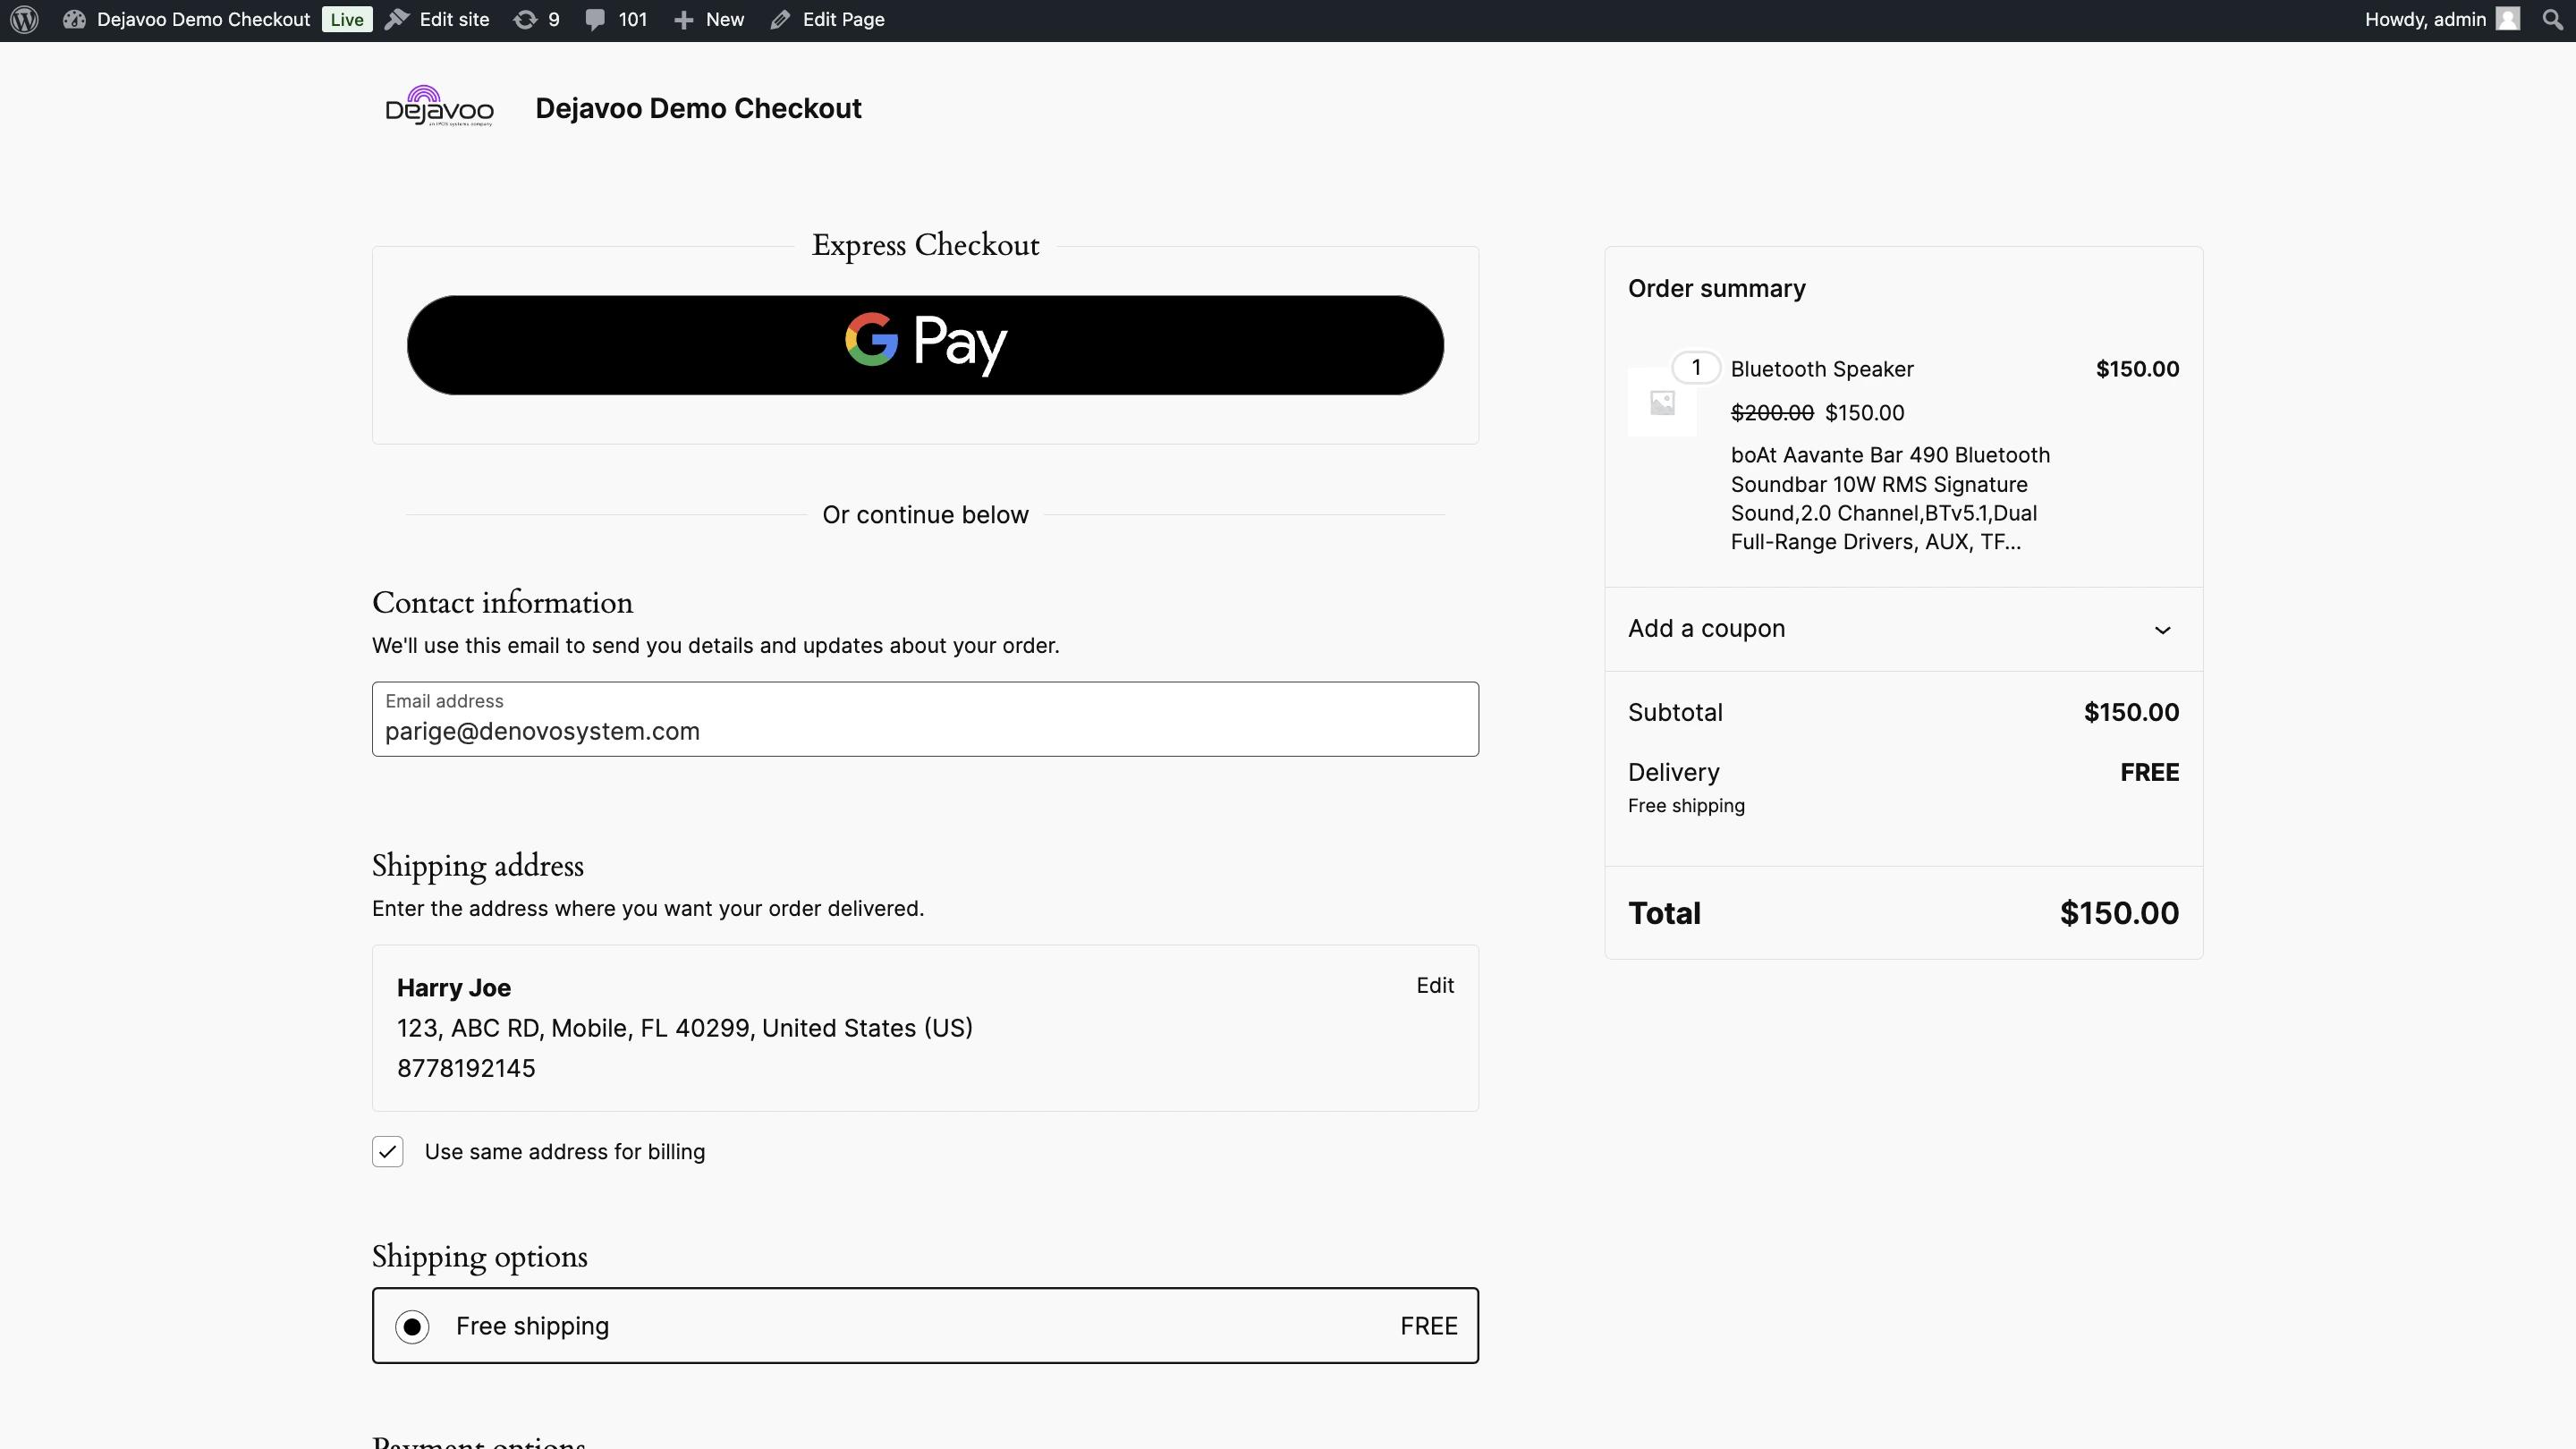
The page should look like this now:
Apple Pay
Merchants using their own custom domain must have it verified and registered with Apple. This verification ensures Apple recognizes the merchant’s domain as legitimate and authorized to display the Apple Pay button during checkout.
If you wish to accept Apple Pay, you must complete domain registration and verification through iPOSpays. For detailed steps and a visual walkthrough, refer to the Apple Pay on iPOSpays documentation.
Setup Notes
Once you’ve registered your domain or subdomain with Apple Pay via iPOSpays, follow the steps below:
- In the Express Checkouts section, enable the Apple Pay checkbox.
- If you are using the plugin for the first time, the Apple Pay logo should appear automatically.
- If it does not, ensure that auto-updates are enabled for the plugin and that you are on version 1.3.6 or above.

- Then click Download Parameter — the system will automatically retrieve the required information for your CloudPOS TPN, and the logo will appear.
- Enter your Apple Merchant Identifier number in the designated field.
- Click Customize to adjust the Apple Pay button design (language, color, and font).
- Click Save Settings to apply changes.
The page should look like this:

Bank (ACH)
To facilitate direct-to-bank payment transactions (ACH), your CloudPOS TPN must have ACH enabled at the S.T.E.A.M → Edit Parameters level. If this setting is not enabled for your TPN, contact your ISO or relationship manager to have it enabled.
Setup Notes
- In the Payment Methods section, enable the Bank checkbox.

- If you are using the plugin for the first time, the Bank payment logo should appear automatically.
- If it does not, ensure that ACH is enabled for your CloudPOS TPN, auto-updates are enabled for the plugin, and that you are on version 1.3.6 or above.

- Then click Download Parameter. The system will automatically retrieve the required information for your CloudPOS TPN, and the Bank logo will appear.

- You can also customize the text and description displayed for this payment method.

- Click Save Settings to apply changes.
The page should look like this:

Customizing the Redirect Page Payment
The payment options in this field can be changed by adjusting the parameters of your CloudPOS TPN on the iPOSpays portal.
- Payments Accepted at Checkout → Enable iPOSpays Gateway.

-
As mentioned above, the payment options on this page will be based on your CloudPOS TPN configurations.
-
Click on Customize to change the name and description of the page.


-
Click Save Settings for the changes to take effect.
-
The page should look like this:

- Remember to click Download Param every time after you change any parameters for your CloudPOS TPN.

Error Codes and Their Meaning
For a complete list of error codes and their explanations, please visit our Error Codes Reference Page.
Last updated on